
The Happiest Photos on Earth: Tips and Tricks for magical documentation of your Disney Vacation!
After seven trips to Disney World as a professional photographer, The Happiest Photos on Earth: Tips and Tricks for magical documentation of your Disney Vacation! has FINALLY come to fruition! I’m confident I’ve accumulated enough knowledge, mistakes to learn from and enough all-time favorite photos to share some very helpful tips and tricks with you! I want to help you get the most out of capturing your magical vacation (or trip, because let’s be real, we ALL know a visit to Disney World is better labeled as a trip over a vacation!).
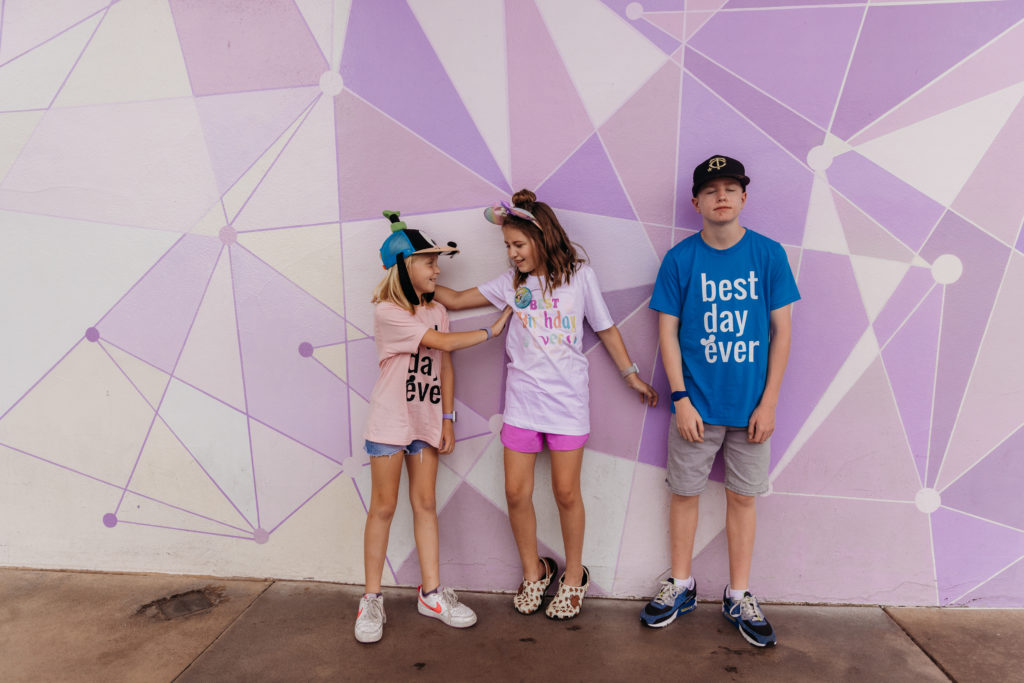
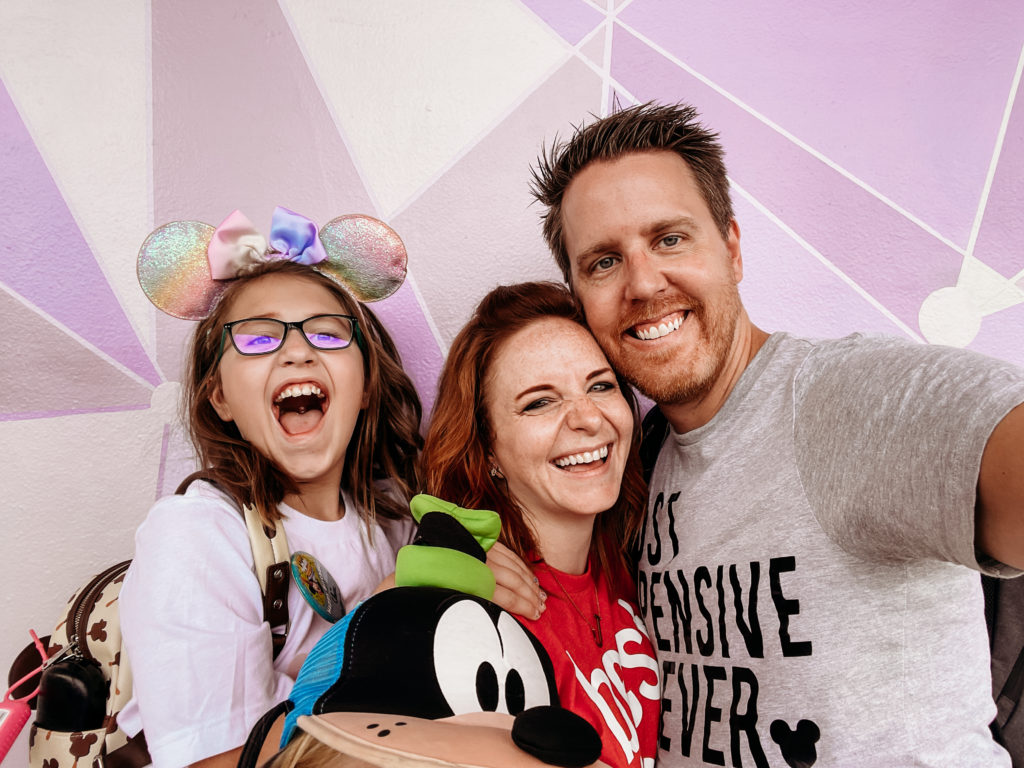
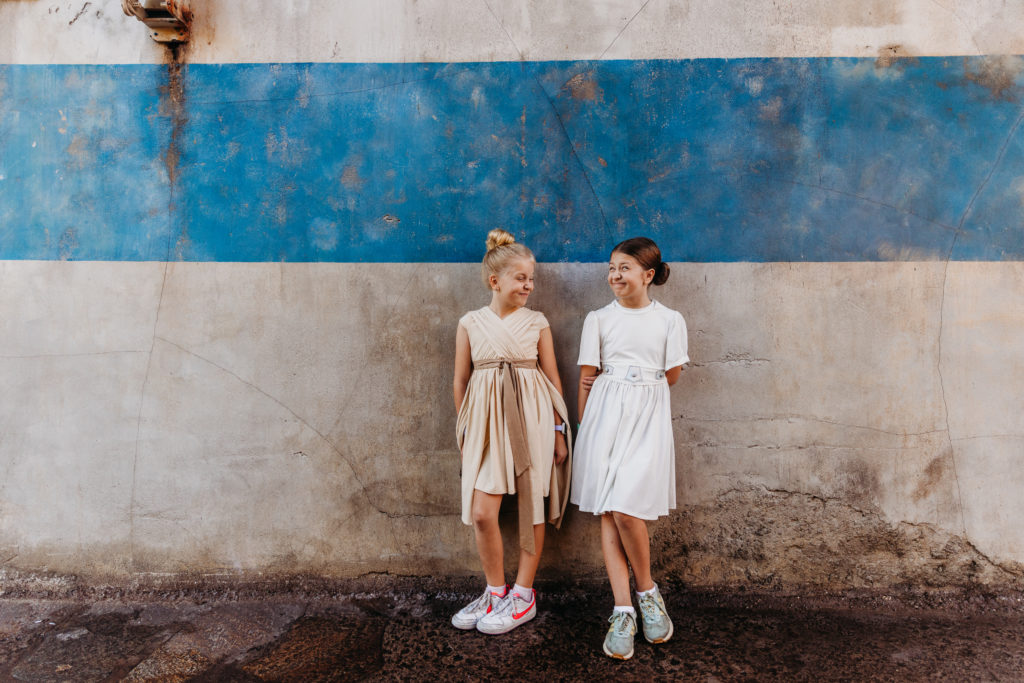
My first tip before I dive into ANYTHING else is to just breathe, relax and ultimately remind yourself that whatever memories you come home with are still THE BEST MEMORIES. Disney trips are exhausting. These vacations are WORK, and with all the new Genie+/Lightning Lane requirements tying you up on your phone often, it is easy to forget to just stop and look around and enjoy the magic. You’ll likely miss lots of great shots. You’ll likely pass by something you’ve been wanting to shoot and at that exact moment in time, your otherwise cooperative kids just aren’t in the mood to “stop again”. Trust me. Even mine. I had never taken photos at the insta-famous purple wall before, and it took until the end of our trip to convince my kids to stop there for a few quick shots.

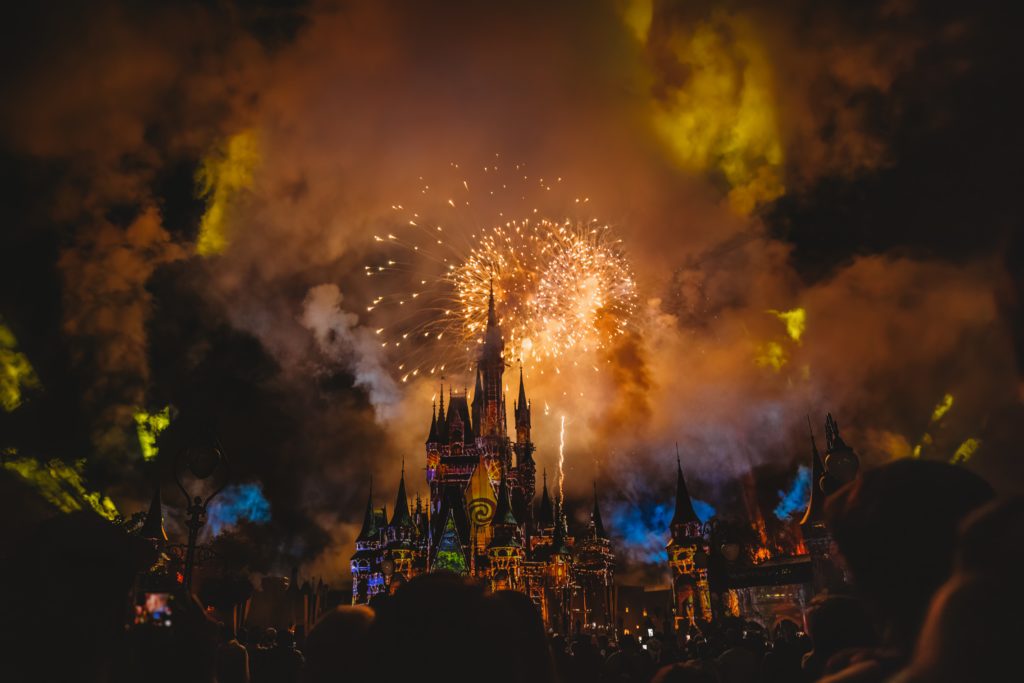
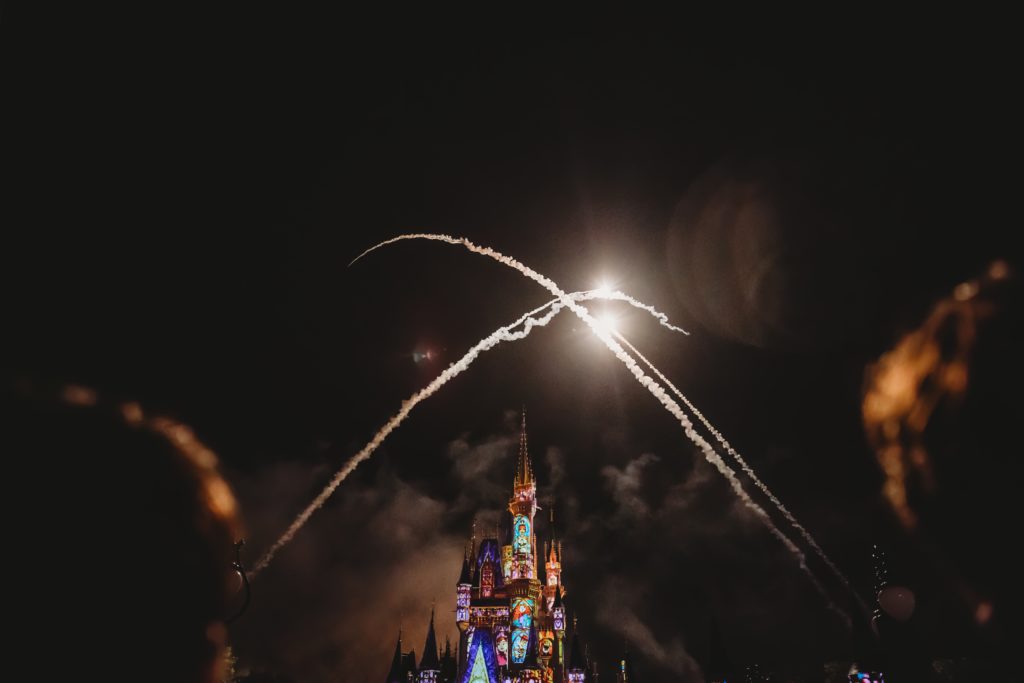
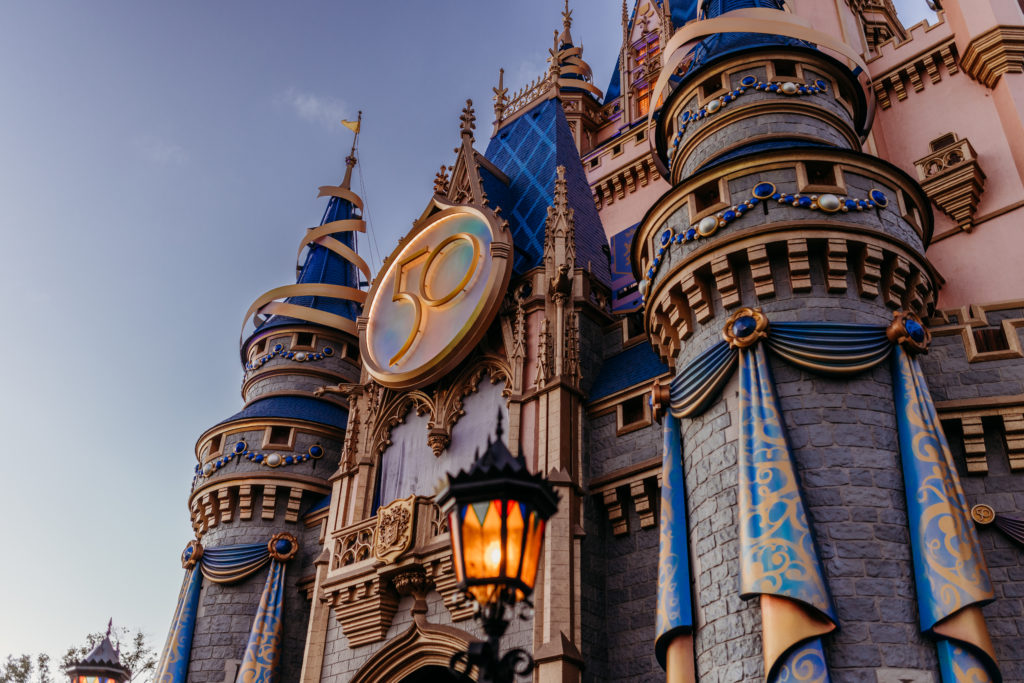
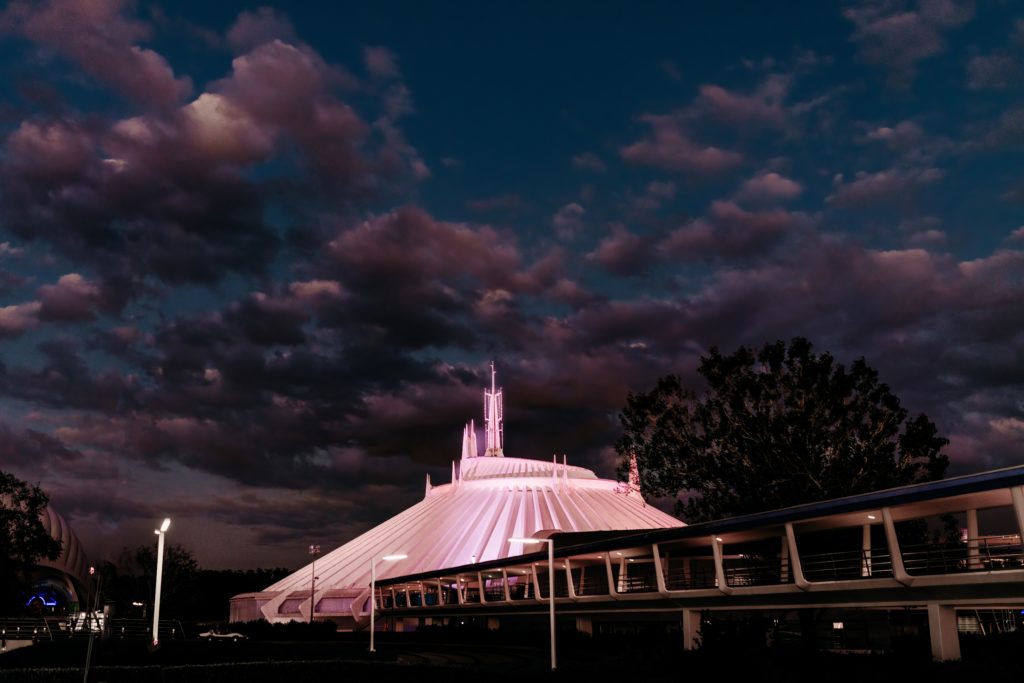
Just tell yourself that you simply won’t and can’t capture everything and you’ll already be a lot less stressed about it. This was even something I had to remind myself of. During my 2019 trip, I captured an epic shot of the castle during the fireworks show. For this last trip, we didn’t opt to make great seats at the fireworks show important, and while I got a little sad at missing that chance, I DID get an awesome shot of the castle with an epic sunset on a different night which was something I had never done before.

Moving on, this guide will cover two main areas.
- Documenting your vacation as a whole.
- Getting those coveted “empty castle” shots.
Documenting your vacation
Logistics and what I brought in my camera bag
While my guide will be primarily focused on using a DSLR/mirrorless camera (and sharing my best shots from those types of cameras), most of my tips really are about capturing your vacation. Whatever you choose to use whether it be a mirrorless, point and shoot, phone, film or Go Pro, it really doesn’t matter. I personally use more than just my mirrorless camera to round out my captures while at Disney, with my iPhone and Go Pro getting lots of use, especially for video.

Let’s start there, shall we? What did I bring along? For my most recent trip in October, I packed along:
- Canon R5 mirrorless body
- Canon 24-70 f/2.8
- Sigma 35mm
- Canon 70-200mm f/2.8
- Go Pro Hero 11 with handheld stick attachment
- 2 iPhone 12 Pro Maxes
- P.S. I use the Canon RF adapter to fit my old existing lenses on to my R5. I don’t own any RF lenses yet.
The 24-70 was on my camera body 90% of the time. I wish it wasn’t so heavy, but I love having the quick access of the zoom for wide and closer shots on the go. I used the 70-200 just once. Most of what I brought stayed in the hotel room minus the Go Pro, iPhones and 24-70.
The weight of the 24-70 is probably my most asked question. Is it hard to deal with? For me, personally, no. Is bringing a heavier lens to carry around in the park all day the MOST ideal? No, definitely not. But because it has pretty much been cemented to my camera since I purchased it nearly 5 years ago, I am more than use to the weight. The versatility of it on such a fast-paced vacation is worth it to me. Wide shots of the castle in the background behind my kids and some more close-up portrait styles all within seconds is SO much more manageable than switching out prime lenses to me.
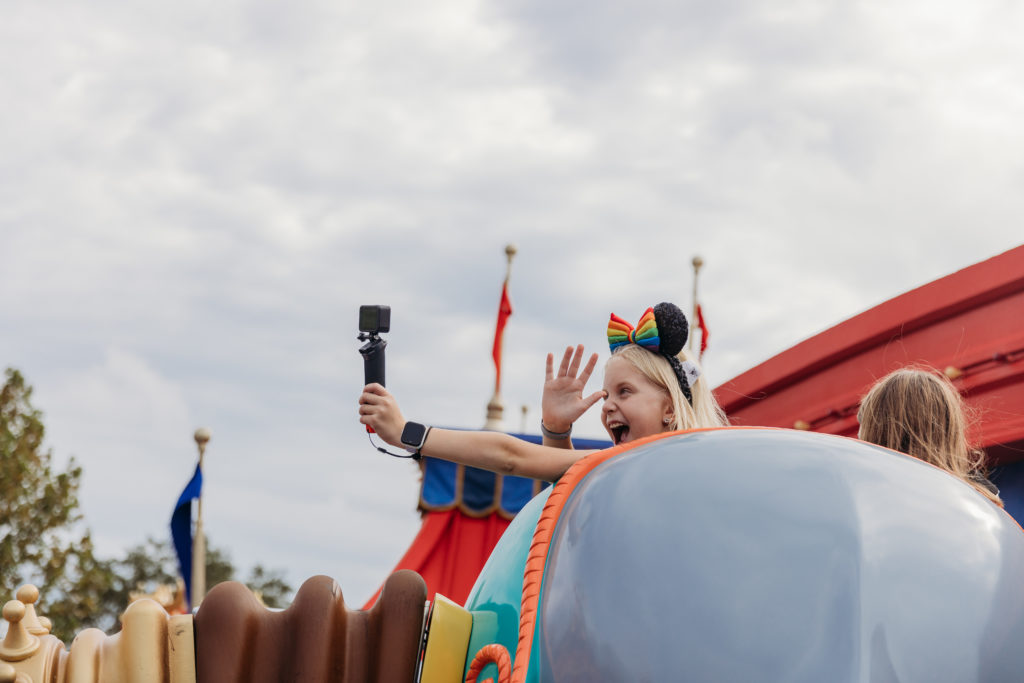
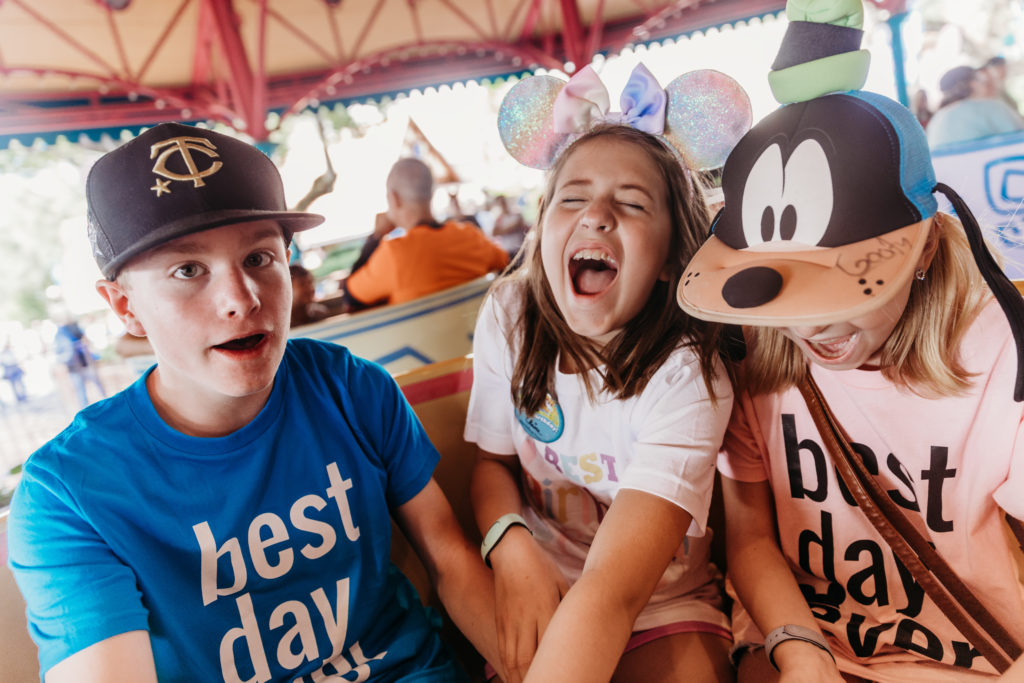
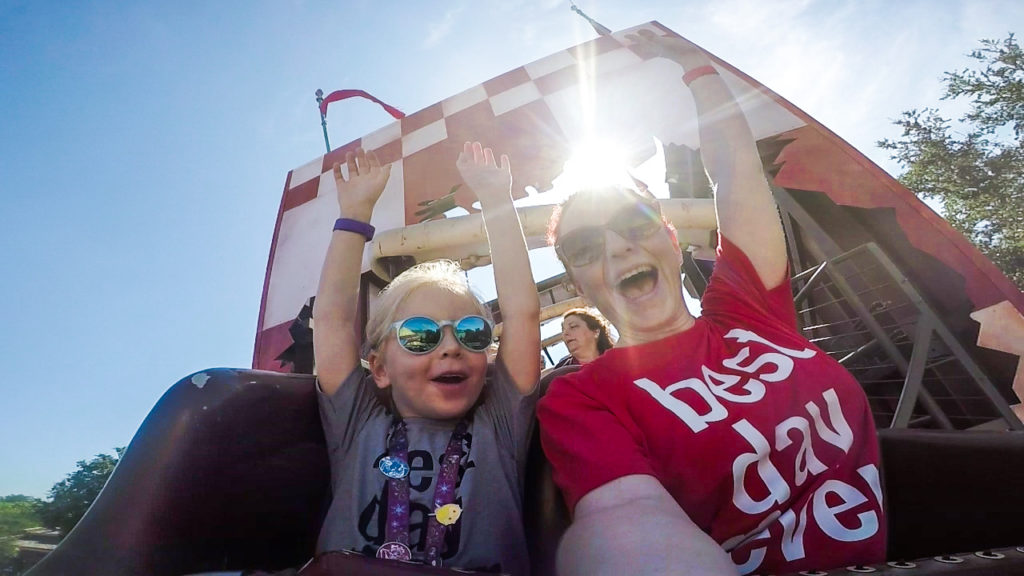
The Go Pro was always with us as well. We primarily use that for videos on rides. One of my kiddos’ favorite things about these trips are the video compilations I put together once we return. Ride videos are a huge component of those for me because there’s nothing better than a happy screaming child on a roller coaster. The Go Pro is SO good for this. As a bonus for the first time this trip, our kids were finally old enough to handle it themselves on multiple rides which was great for a different perspective! My only regret with the go pro is that I didn’t have it out more as we were walking about, especially from my kids’ perspective.
Many of the shots I’ve captured are because I mostly refuse to put my camera away unless we are on a thrill ride. As much as you can tolerate having your camera out and handy, I highly suggest this to snag as many shots as possible, depending on the rides/events of the day, etc. As I look back on my photos from this trip, you can tell when I did get “tired” and didn’t have my camera out much as I’m definitely lacking in quantity of photos from those days.
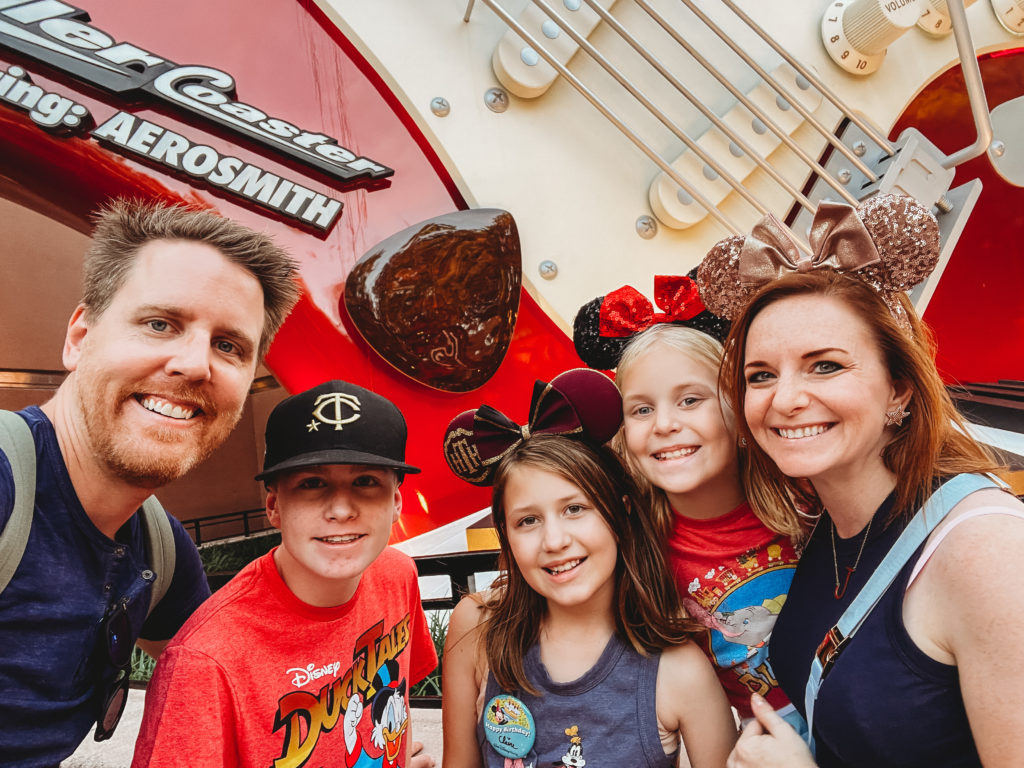
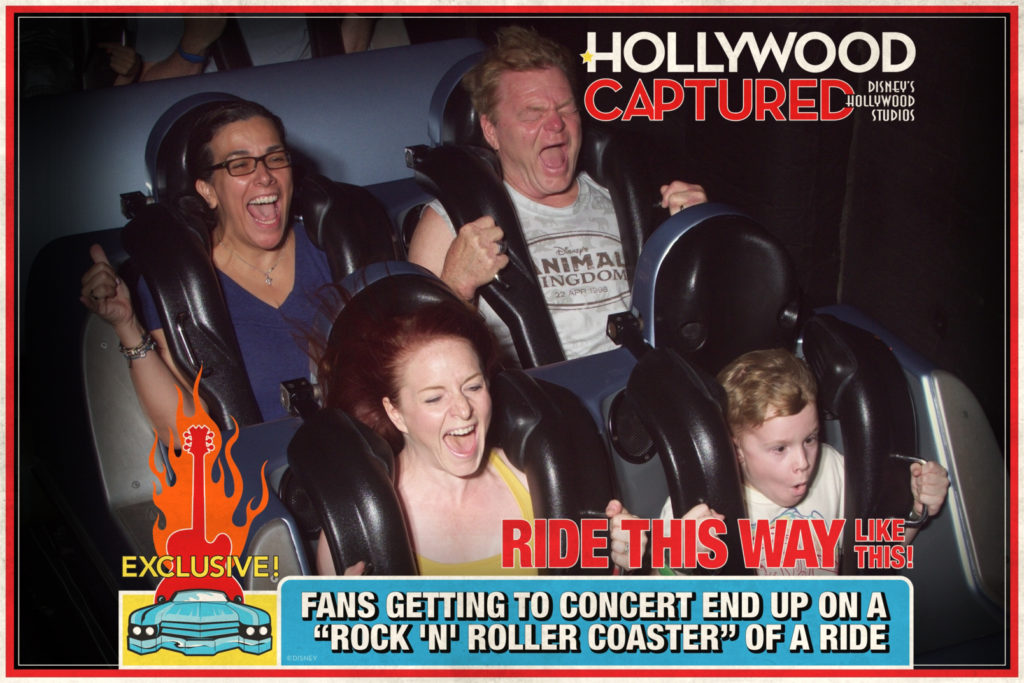
For this last trip, I carried my camera in a Brevite bag when I wasn’t using it or when we were on those thrill rides. The bag even goes upside down with me on Aerosmith’s Rockin’ Roller coaster! (side bar, one of my favorite rides of all time that I’d do over and over). I just wrap it around and under my legs and never have had any issues so long as it’s padded and secure inside. The next Disney Vacation I take, I’ll definitely be bringing along my new Peak Design Everyday Sling 3L. It can be worn on the front cross body style which will be SO much easier to have quick and easy access to the camera.

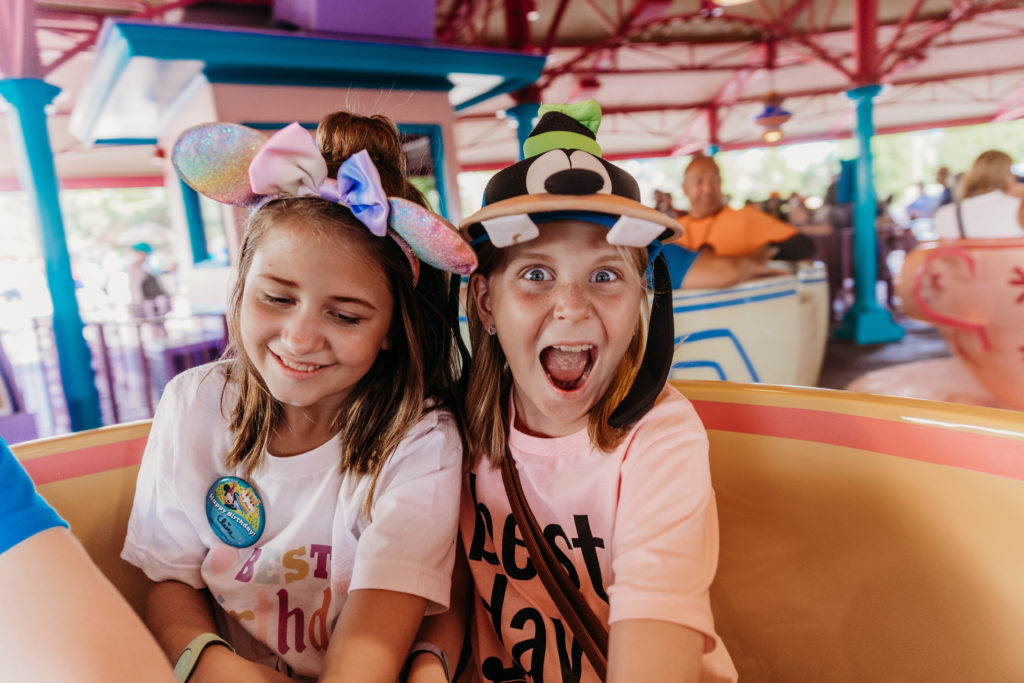
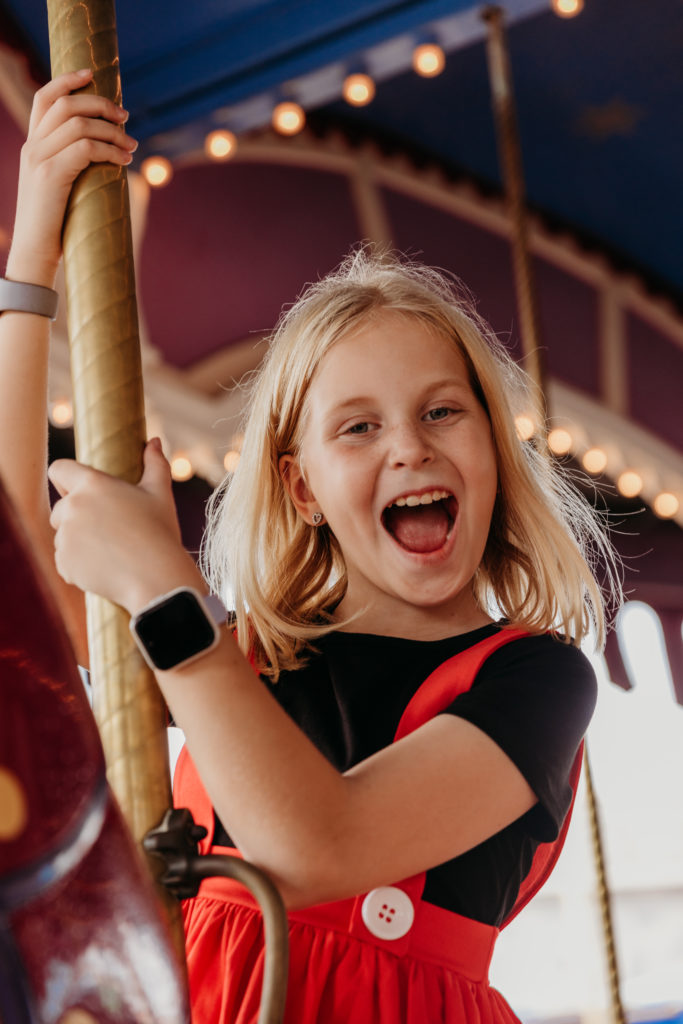
I take a lot of portrait type photos while at Disney, but just like my client work is more storytelling/lifestyle/candid and not just perfect photos of everyone looking at me, neither are my Disney photos. Of course, I need a handful of great photos of my kids looking at me in front of the castle, but those shots never wind up being my absolute favorites. I don’t need or attempt a shot of all my kids looking at me and smiling in front of every main attraction area. One, it’s boring and not my style and two, they will be burnt out, as will most kids.
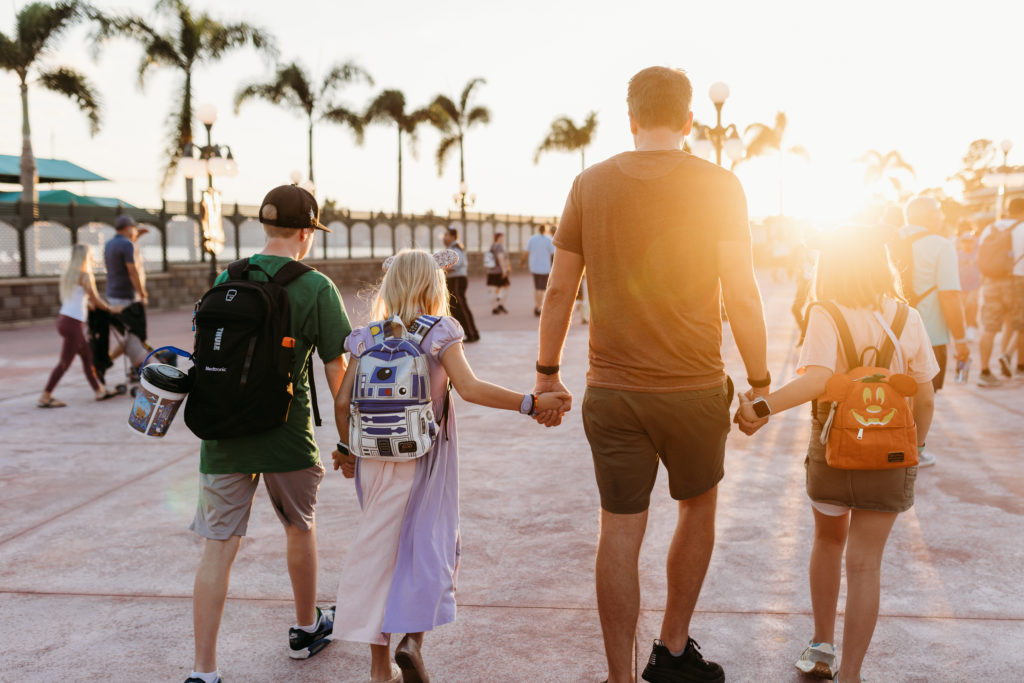
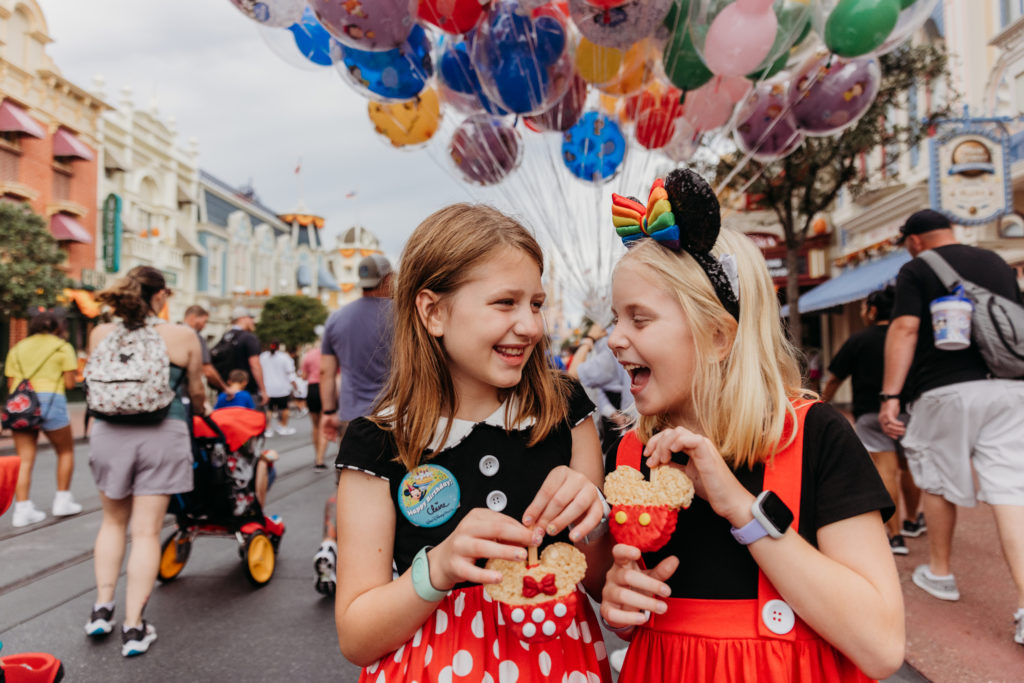
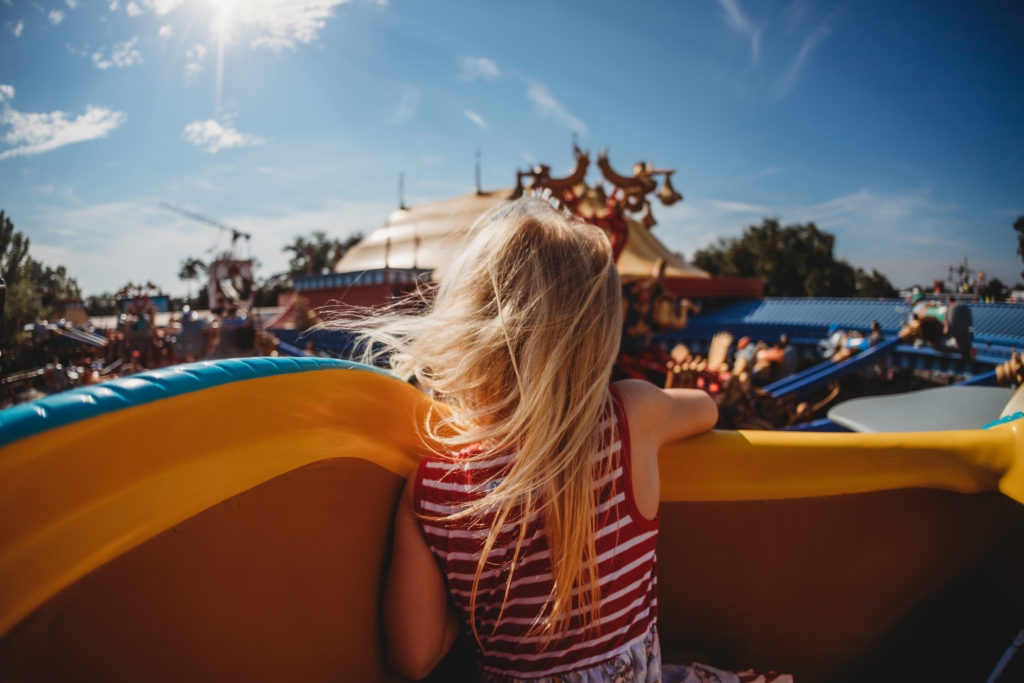
It’s the genuine giggles I capture for me when I haven’t asked them to take a photo. It’s the in-between moments. It’s the twirls in their cute dresses AFTER I’ve gotten that picture perfect smile. It’s capturing the details of park, the characters, the food, the intricate details of the queue lines, and the tiny little moments that happen all throughout the day. Even a photo of one of the kids or your whole family from behind as they walk can make for a great storytelling photo. Heaven knows that walking is a major part of a Disney vacation story!
And just to reiterate this disclaimer, whatever you DO end up capturing will still be fantastic photos to look back on and will help preserve your children’s memory of the trip. I don’t want anyone to read this guide and get stressed out and generate this fantasy shot list that gives you anxiety to complete. Capture what brings you (and your kids!) the most joy! If there are certain things that are important to you, I would suggest making a list on your phone. It’ll be easy to forget through the course of a busy week at Disney so if there are certain must have shots for you, jot them down!
Where I find photography inspiration while at the parks
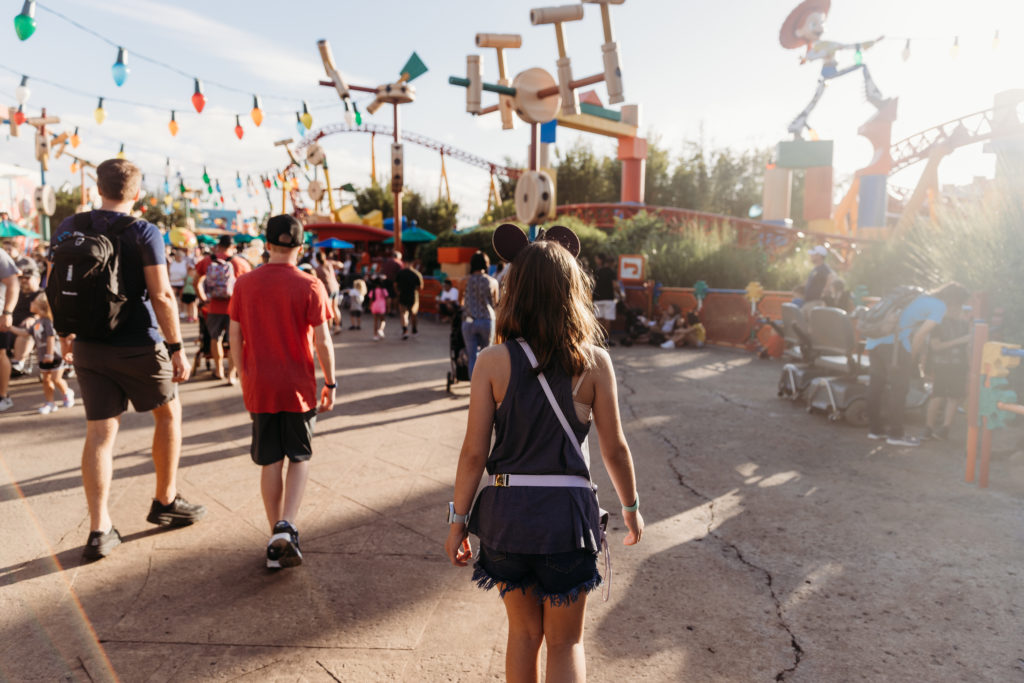
Disney is a photographer’s haven. So many attractions. So many details. Even the queue lines where you spend all that time waiting can provide you great content. Take photos of those lines (as a heads up, the light is not always the greatest!), the castle and all it’s gorgeous details (in good light of course), all the other landmarks and attractions, the food, the parade characters waving by, the daytime and nighttime shows, the storefronts, and the great big bunch of balloons on Main Street. The details are just incredible everywhere. If I had to pick a favorite, I’d say the design details of Toy Story land are my absolute fav! This should be no surprise to anyone who’s followed me for a while as I LOVE color/rainbow colored anything.


Ride Photos
One of the most obvious places to capture joyous candid photos is on the rides themselves. Some of my favorite photos from our past few trips are the ones I took while we were on a ride. Of course, this isn’t feasible on every attraction, but here are a few of the rides I LOVE capturing still photos (and videos) on:
The Teacups: I’ve used my fisheye and most recently my 24-70 for this ride. Make sure to ride during the day as it is covered and will have wonky light as the daylight fades. The Teacups also make for EXCELLENT video footage whether its DSLR/Mirrorless, Go Pro, or your phone.
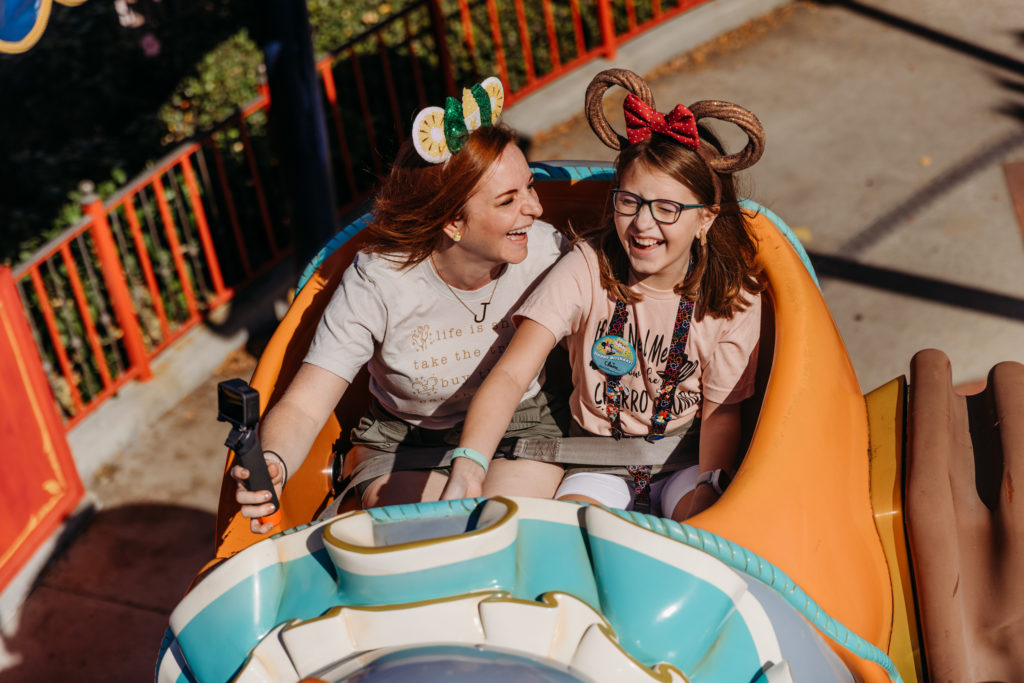
Dumbo: This one takes some careful planning. If you ride when the ride is kind of busy and they are rushing people in and out quickly, you can’t always get elephants next to each other in your group. Go when the wait is low-under 15 minutes. Make sure whoever is using the camera is in the front elephant and everyone else is behind. And if you are EXTRA extra like me, you might orchestrate getting on this ride TWICE so that the adults can take turns photographing/being in the photos (but more on getting in the frame in a bit!).
My biggest pro tip for Dumbo though is to do it either early in the day (using the Dumbo ride on the left if they are running it), or ride as the sun is setting behind the castle (using the Dumbo ride on the right hand side) for the very best light. This last trip we went on the ride at what must have been high noon as it was very difficult to navigate the bright sun and constant shadows you’d encounter as the ride turned in its circle. These tips would also work for getting photos on The Magic Carpets of Aladdin, Astro Orbiter, and Triceratops Spin.
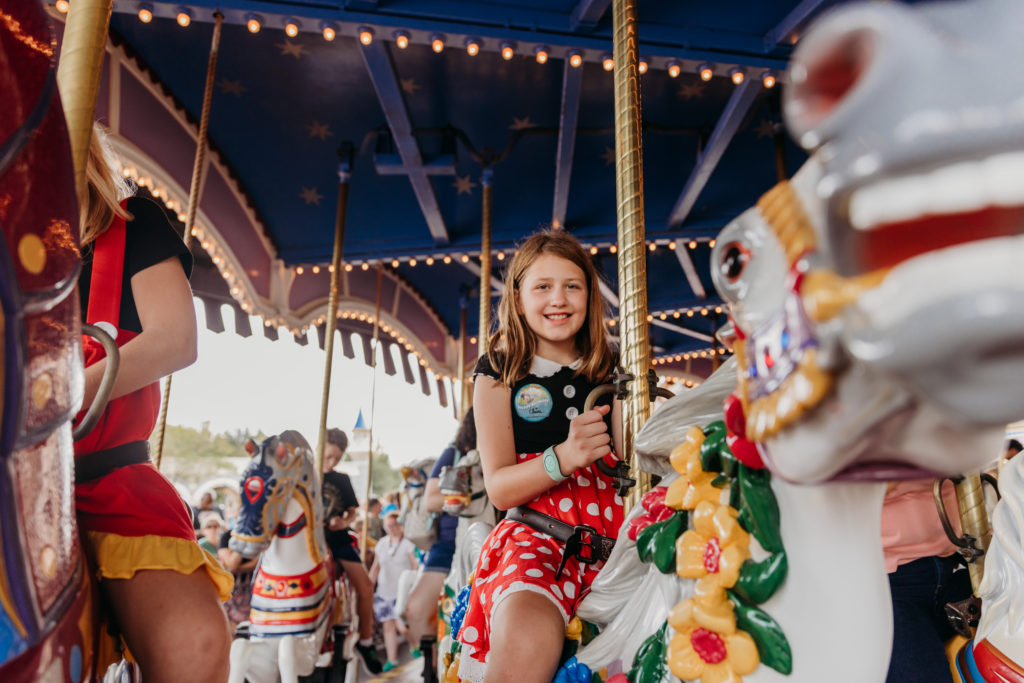
The Carousel: Easy ride with usually a short wait to snag some cute photos on.
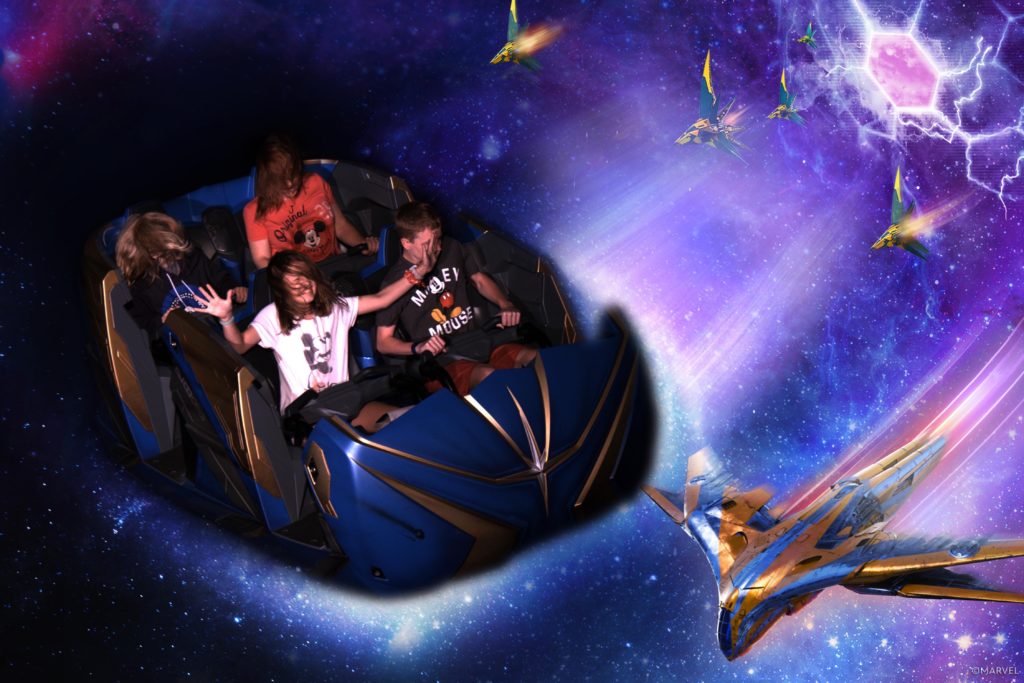
For rides that are out in the open light but are more thrill type rides that make using a DSLR/mirrorless a little difficult and risky, I have been known to take my video footage from my Go Pro and create a still image from that. I’ve done it from videos captured on Mine Train, Barnstormer, Big Thunder and Slinky Dog Dash. Is it the best quality? No, not at all. But I like snagging the most joyous faces and freezing them from the video.
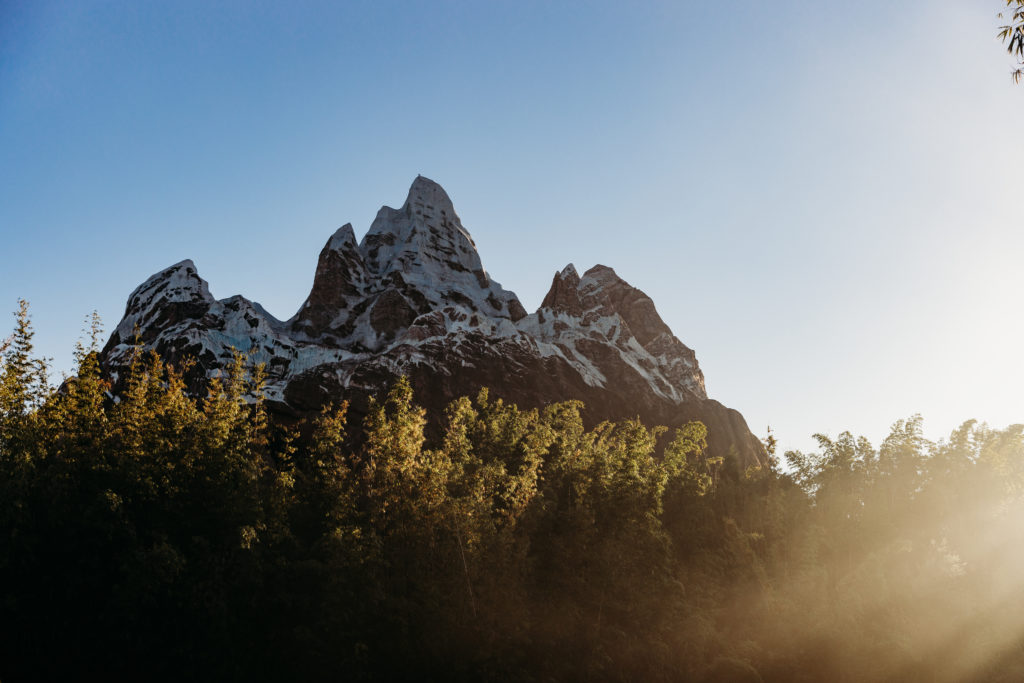
Speaking of all these rides, I mentioned it above, but it’s worth expanding on. Because I use a lot of this content to create a video compilation for my kids, I will usually snag still images AND videos of many of these rides too—Slinky Dog has a perfect little area to grab a shot of the coaster coming down one of the hills, Mine Train has a nice spot on the east side of the ride as it comes around the corner, Everest has a great lookout point to see the largest drop, as does Splash Mountain etc. You get the idea!

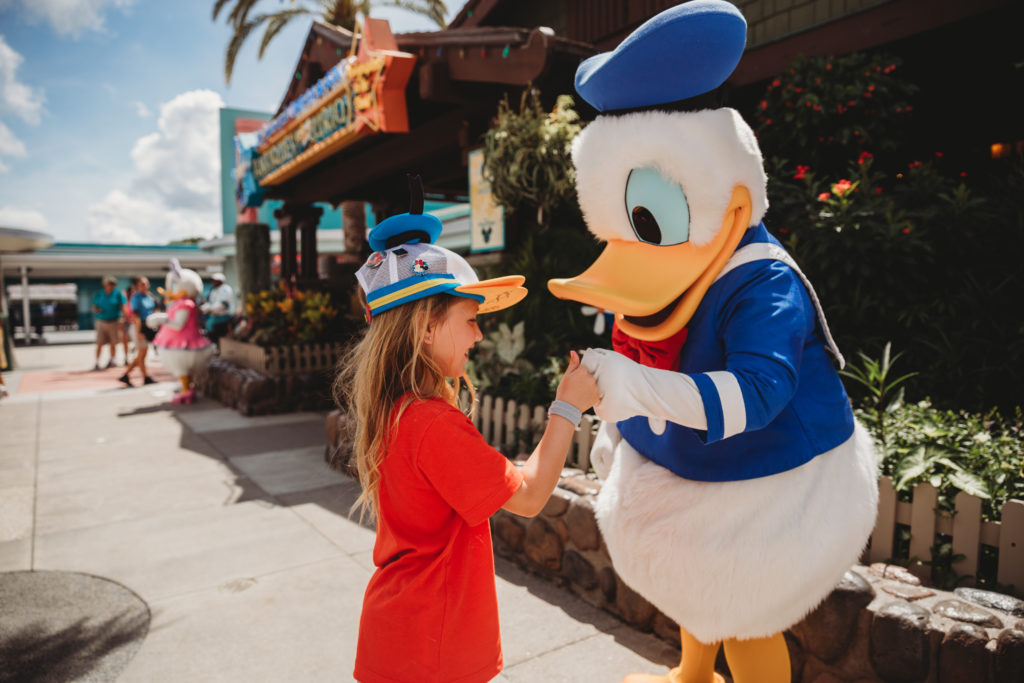
Character Greetings
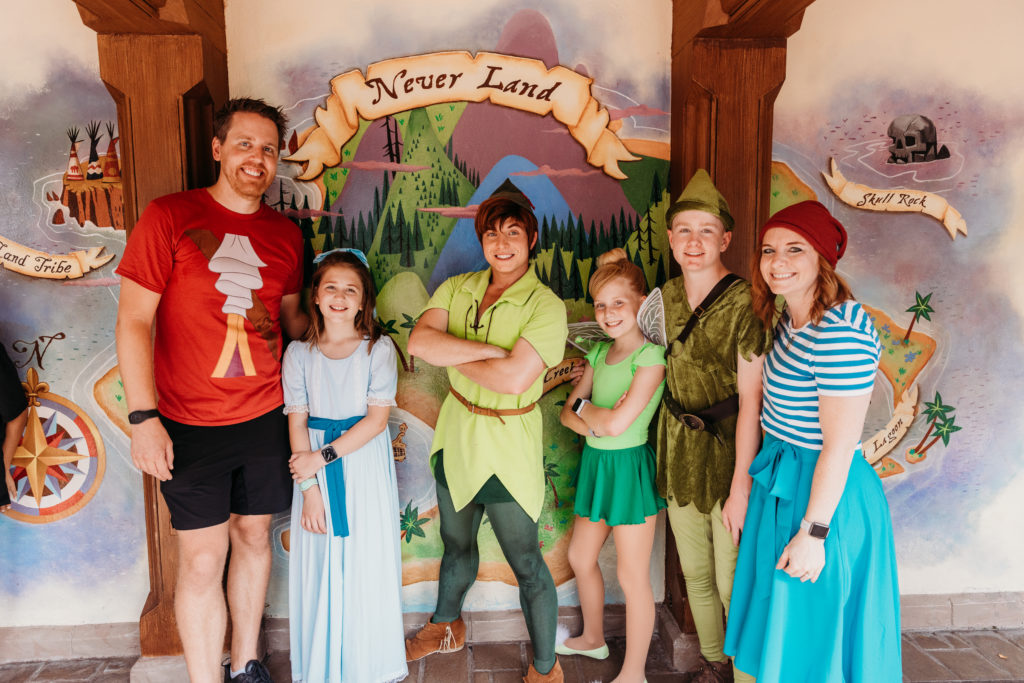
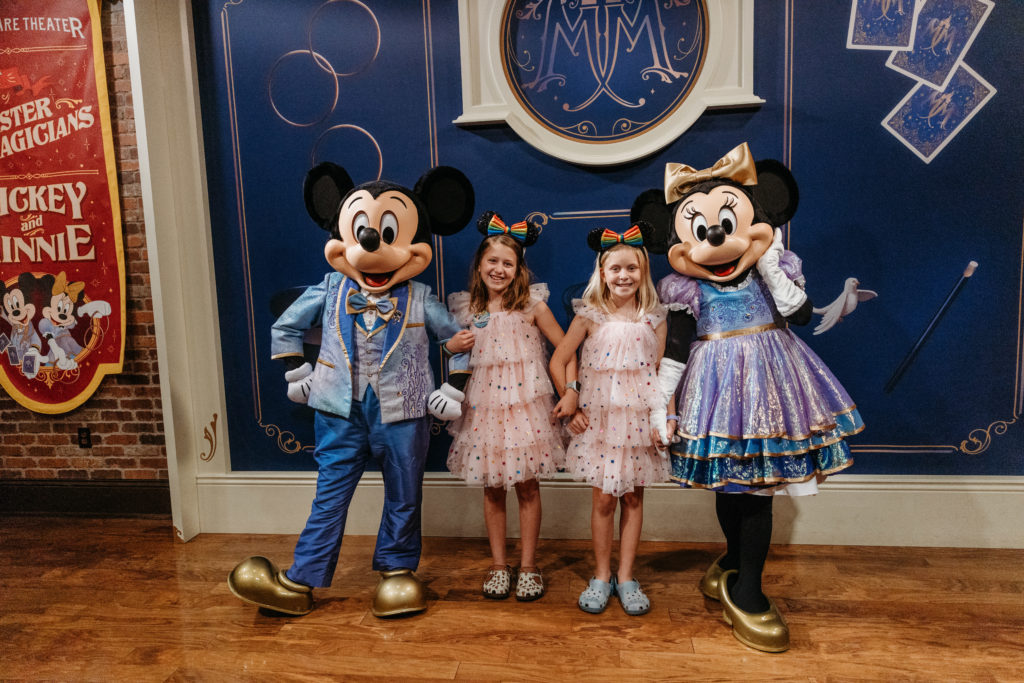
I’ll be up front and real here; the character magic is definitely on its way out in this household. While the girls were excited about the 50th Anniversary version of Mickey and Minnie, there wasn’t much of a request to see many other characters (even Ariel and Olaf, old favorites from years/trips past). We did meet Peter Pan for the first time ever, and boy was it a character greeting of a lifetime. If you’re one of the lucky few who have seen this hilarious personal video of mine, you know what I’m talking about. Let’s just say when Peter Pan met teenage Peter Pan, it was expectedly awkward, but oh so hilarious. A memory I’ll never forget.
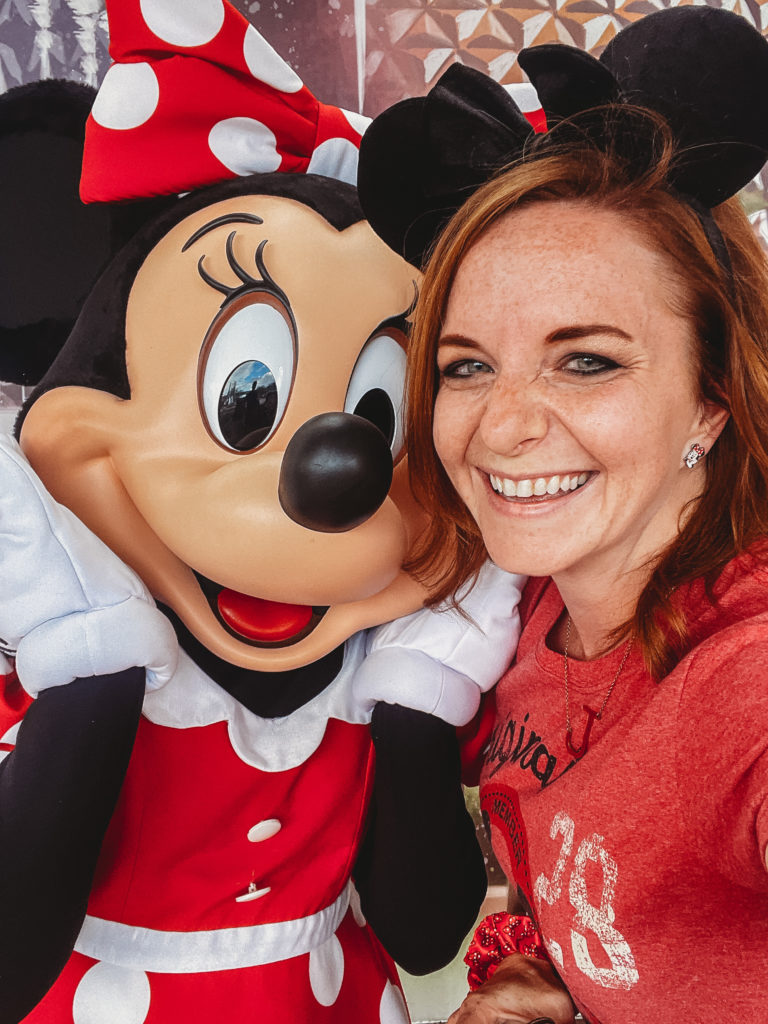
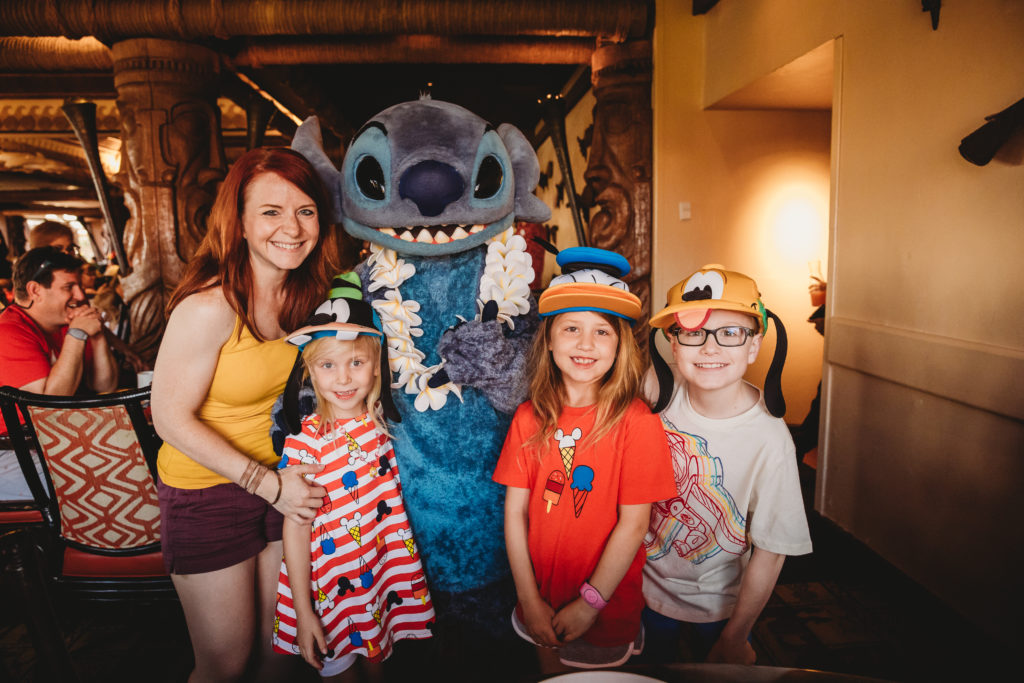
We did jump in a short line to see Minnie and Goofy at Epcot and tried real hard to jump in another Epcot line with more obscure characters you don’t always see like Captain Hook, Launchpad and some others (but we had just missed it!). Other than that, for this particular most recent vacation we are pretty light on character photos. I will say, take selfies with the characters if they let you. I find it even more fun than a standard photo for some reason.
For characters indoors, the light is usually difficult to work with or just not good at all. Get what you can and leave a lot of it up to the photo pass photographers (if using) as they utilize flash when necessary. Since you are most likely not carrying a speedlight around (I sure wasn’t), you’ll need to bump that ISO up, be using Kelvin to take your white balance way cooler in most instances and have as slow a shutter speed as you can manage without camera shake.
Prep your kids before it’s their turn. Make sure (especially if they are older) to not just stand there and look awkward. When they were young, the excitement was genuine and easy. Older kids, not so much. Regardless, I always start with video as our turn came up. The excitement on their faces when they were younger was gold. Video footage of princess hugs and warm hugs from Olaf made great content for the final video. I’d quickly switch to photo to grab those candid photos and THEN, at the very end, have everyone looking at me and smiling to maximize what I could get out of those very brief minutes you get with the characters. If the line is short, they will generally take a little more time with each kid.
Get.in.the.frame
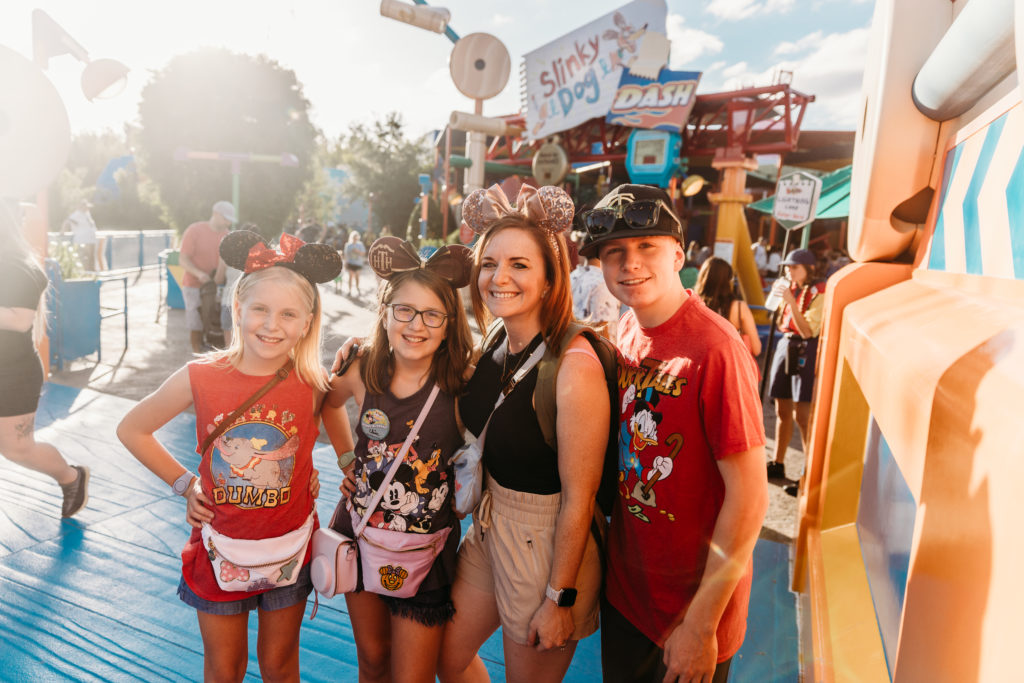
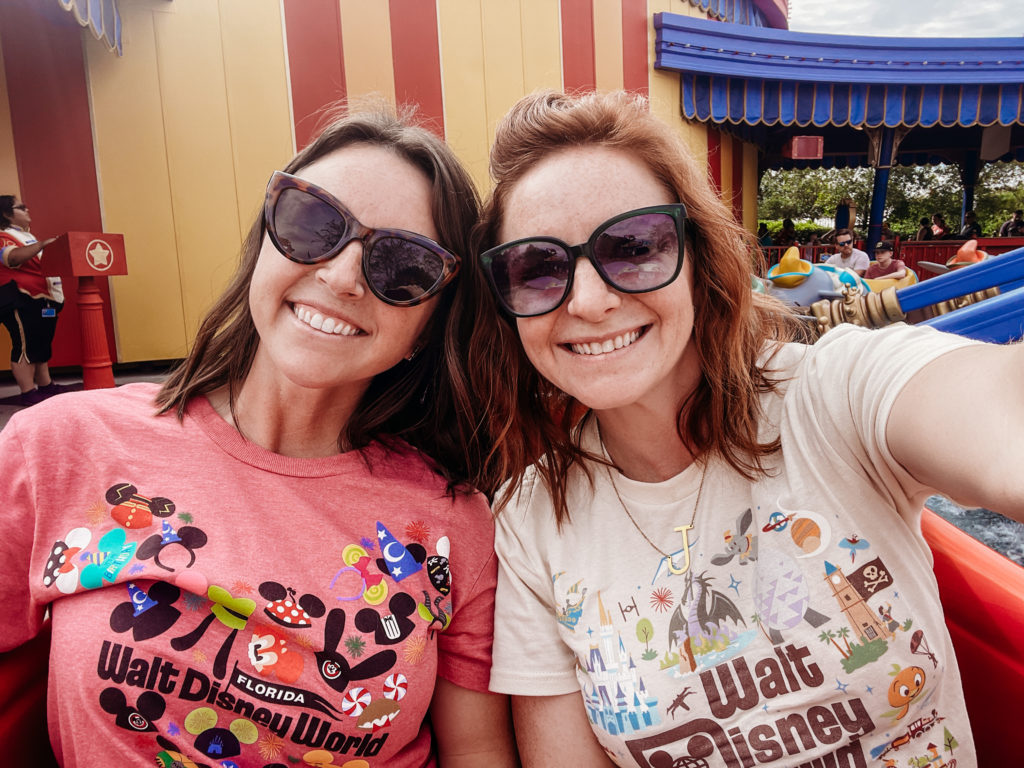
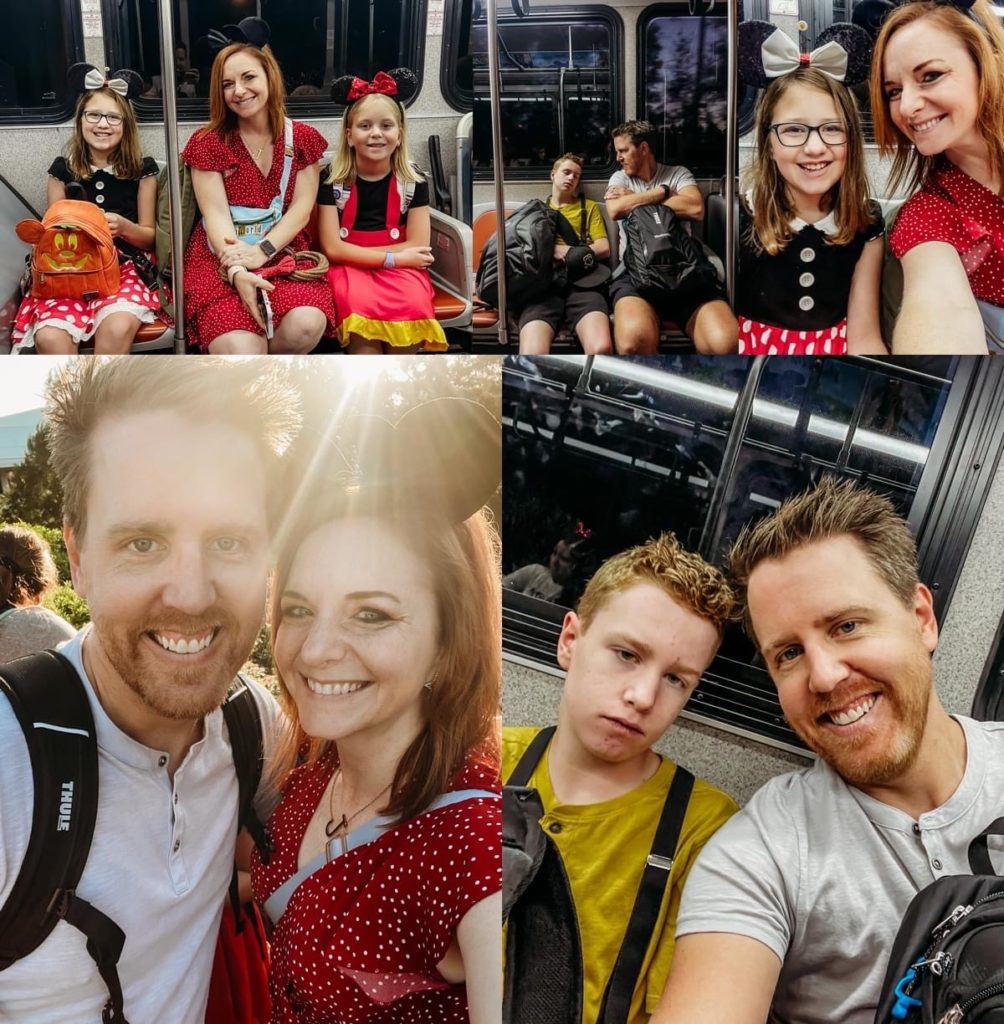
Like most photographers (moms), I exist mostly in selfies with my kids. Over the years I have gotten much better at passing off the camera and asking to be in the photos, too. There are tons of ways to make sure you are present in your vacation photos, so if you take anything away from this guide, let this be one of the most important takeaways; because, honestly, this works for everyday life or any kind of trip you take, Disney or not!
- DO take those selfies. Scrolling through my phone there are probably well over a hundred (or maybe more!) selfies of me with various combinations of the kids, my husband, and us as a whole family throughout our trip. It’s quick and easy and boom, there you are! Take selfies with your favorite treats, on the rides mentioned above or quickly before those outdoor thrill rides get going. Chances are you are all decked out in cute Mickey ears and Disney gear so you’ll ALWAYS be ready for a selfie, I’m sure of it!
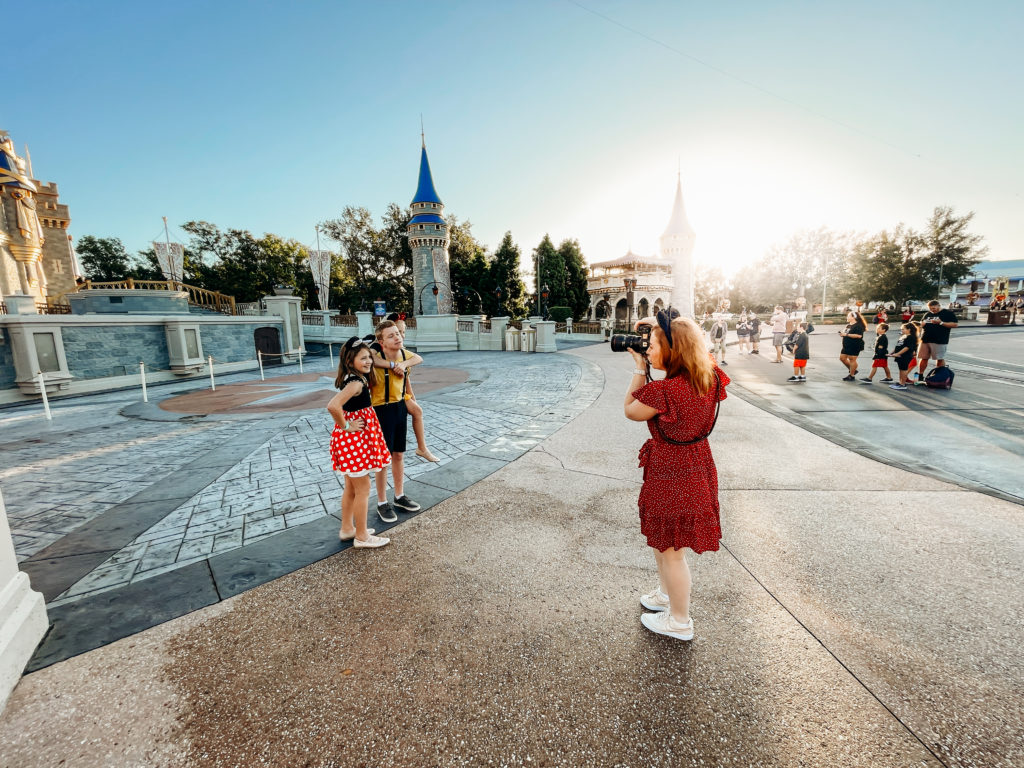
Pass off your camera to your significant other. Mine has been asked to click the buttons for over 13 years now, so long as I already have the settings worked out. In addition, don’t be afraid to be a little extra like me and do some things TWICE. We rode Dumbo first where my husband took the camera and front car and a second time where I had the camera. I would say I find myself floating right between being a little extra and more go with the flow. But I also hate having regrets, so if it’s something I really want, I ask for it and make it happen. In all the trips we had taken, this was my first time getting a real camera photo of me and a kid on the Dumbo ride!
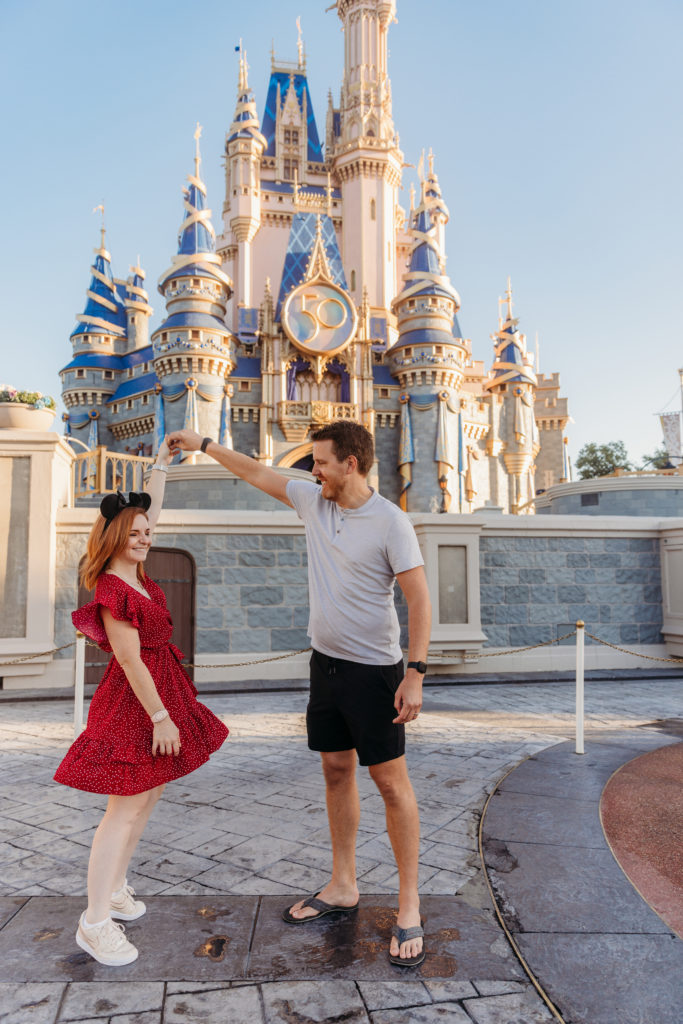
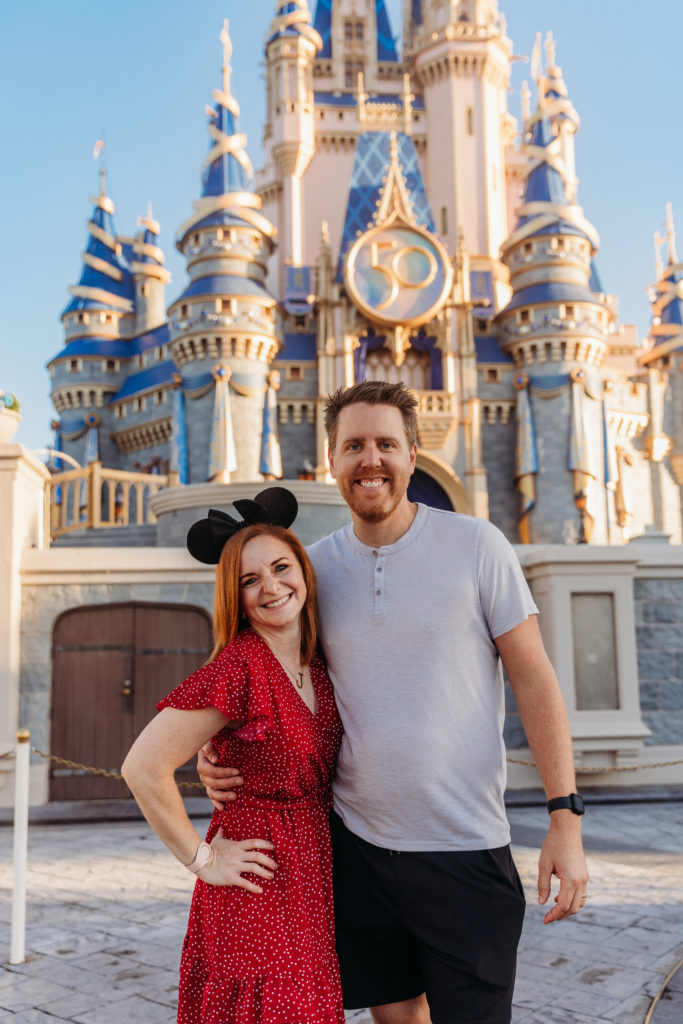
- Pass the camera off to one of your kids! (If comfortable, and applicable based on age, etc.) All three of my kids know how to focus and which button to push. Some of them even have some great composition. My girls are currently interested in learning manual mode, but for the most part, I set up the settings and let them snap some photos, too! This is how my husband and I got some photo of us alone in front of the castle. Bonus, my kids sort of “fight over it” sometimes, so to keep the peace, more than one of them usually wants a turn which just means more shots to choose from in the end. Dare I even say I feel more comfortable passing off the camera to my own kids than a random stranger?! Case in point, we did this for one good shot of us in front of the castle and out of the 6-7 the person took, one was in focus. Just one.
- Utilize Disney Photo Pass. It’s not very cheap anymore, but I feel like it’s worth it for the ride photos alone. We don’t always make as many stops with photo pass photographers around the park as we probably should for the cost, but when a line is short, it’s worth it to jump in to grab more shots of the entire family. It’s also awesome to instantly have those shots right on the Disney app.
Video Tips
As I’ve mentioned various times in this guide, each Disney vacation we’ve taken culminates into a video compilation once I finally work through all my content. I haven’t started the video for this trip yet because one, we went on it during my busy season, and I only just recently finished sorting through the photos! Two, I haven’t culled through the videos yet but hopefully I can have it all done soon. Here’s a link to the video from our 2019 trip!
I created a video once on a whim for the first time after our 2015 Disneyland vacation, and as my children are creatures of habit and love themselves some traditions, a new one was born and every Disney vacation since, (and many non Disney trips as well) have videos created for them. It is honestly my favorite way to look back at these trips, especially Disney.
For content, I’ve covered a lot of what I include but it’s everything from iPhone selfies, and iPhone captured videos, Go Pro videos (especially of us on the rides), still photos from the mirrorless, video clips from the mirrorless, and even screen captures turned into still photos from some of the videos.
I most recently used iMovie to put it all together. I also own Adobe Premier but I haven’t quite figured that one all out yet!
Most people have been requesting tips for taking actual photos, so if you want to hear a little more on how to make the videos, just message me!
The Famous Empty Castle Photos
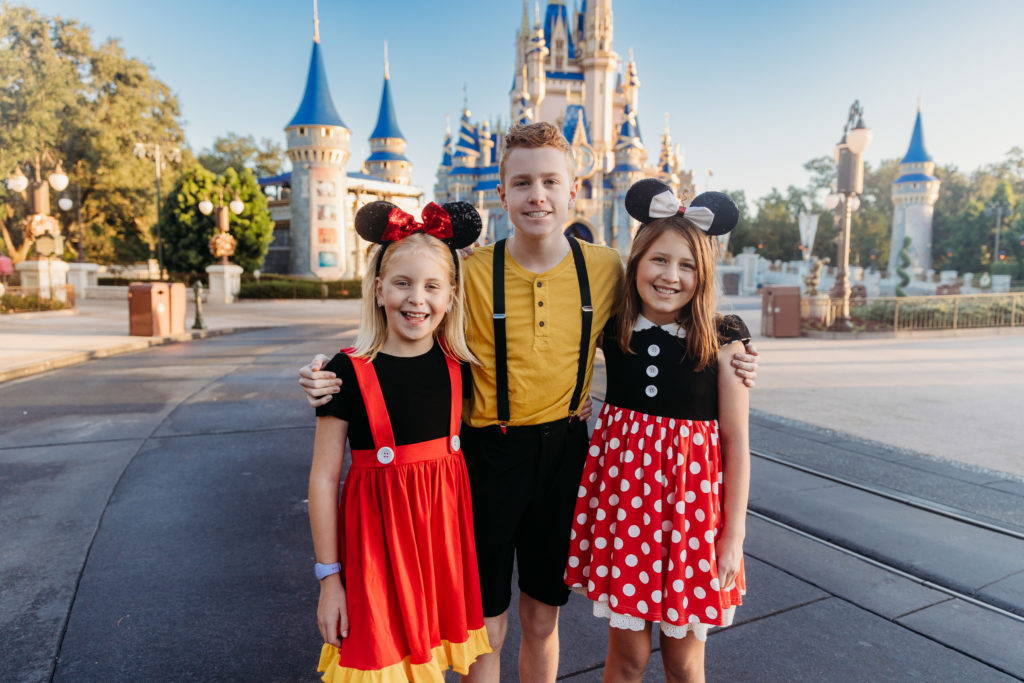
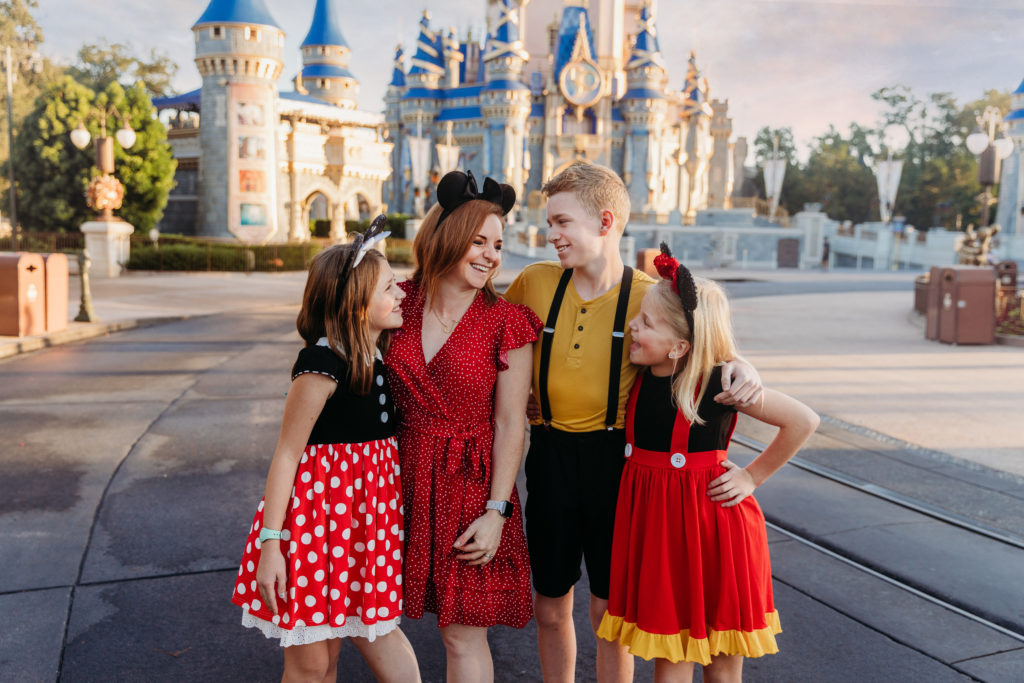
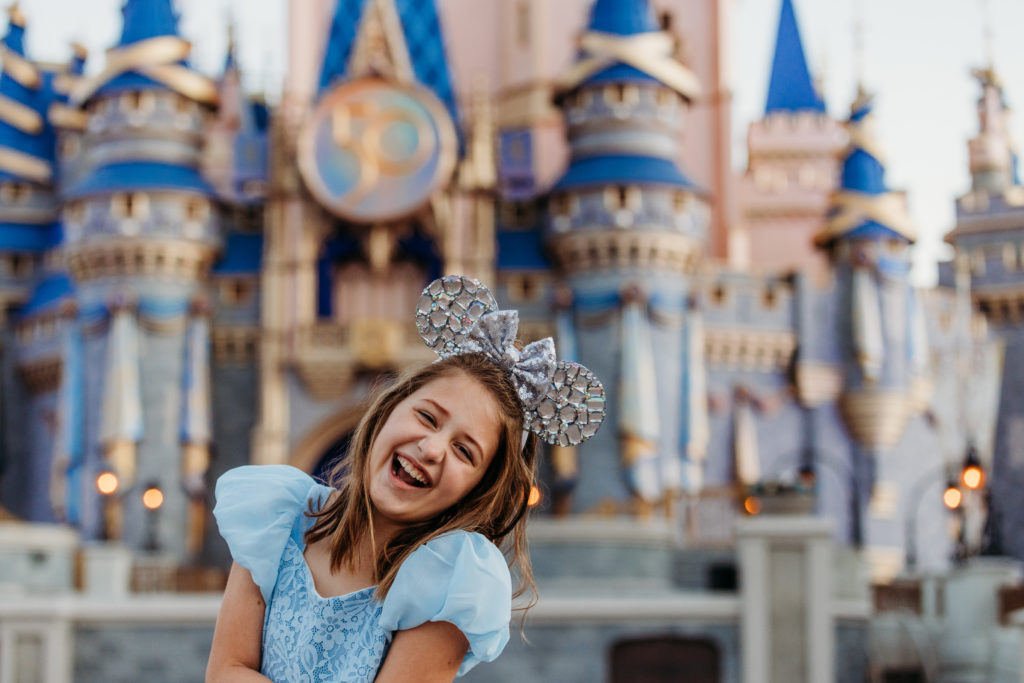
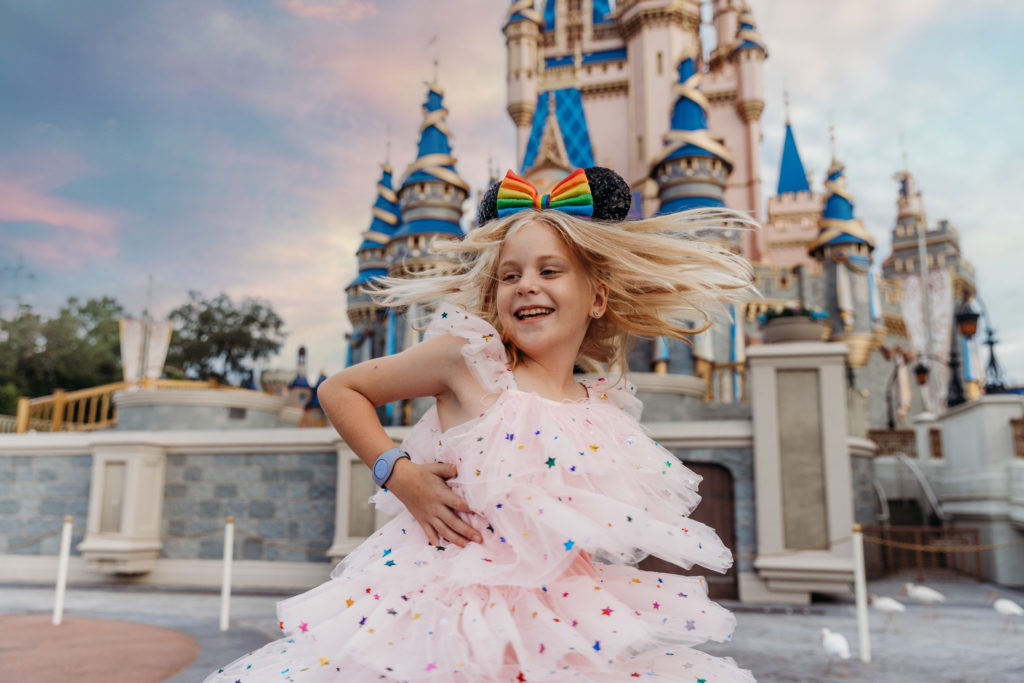
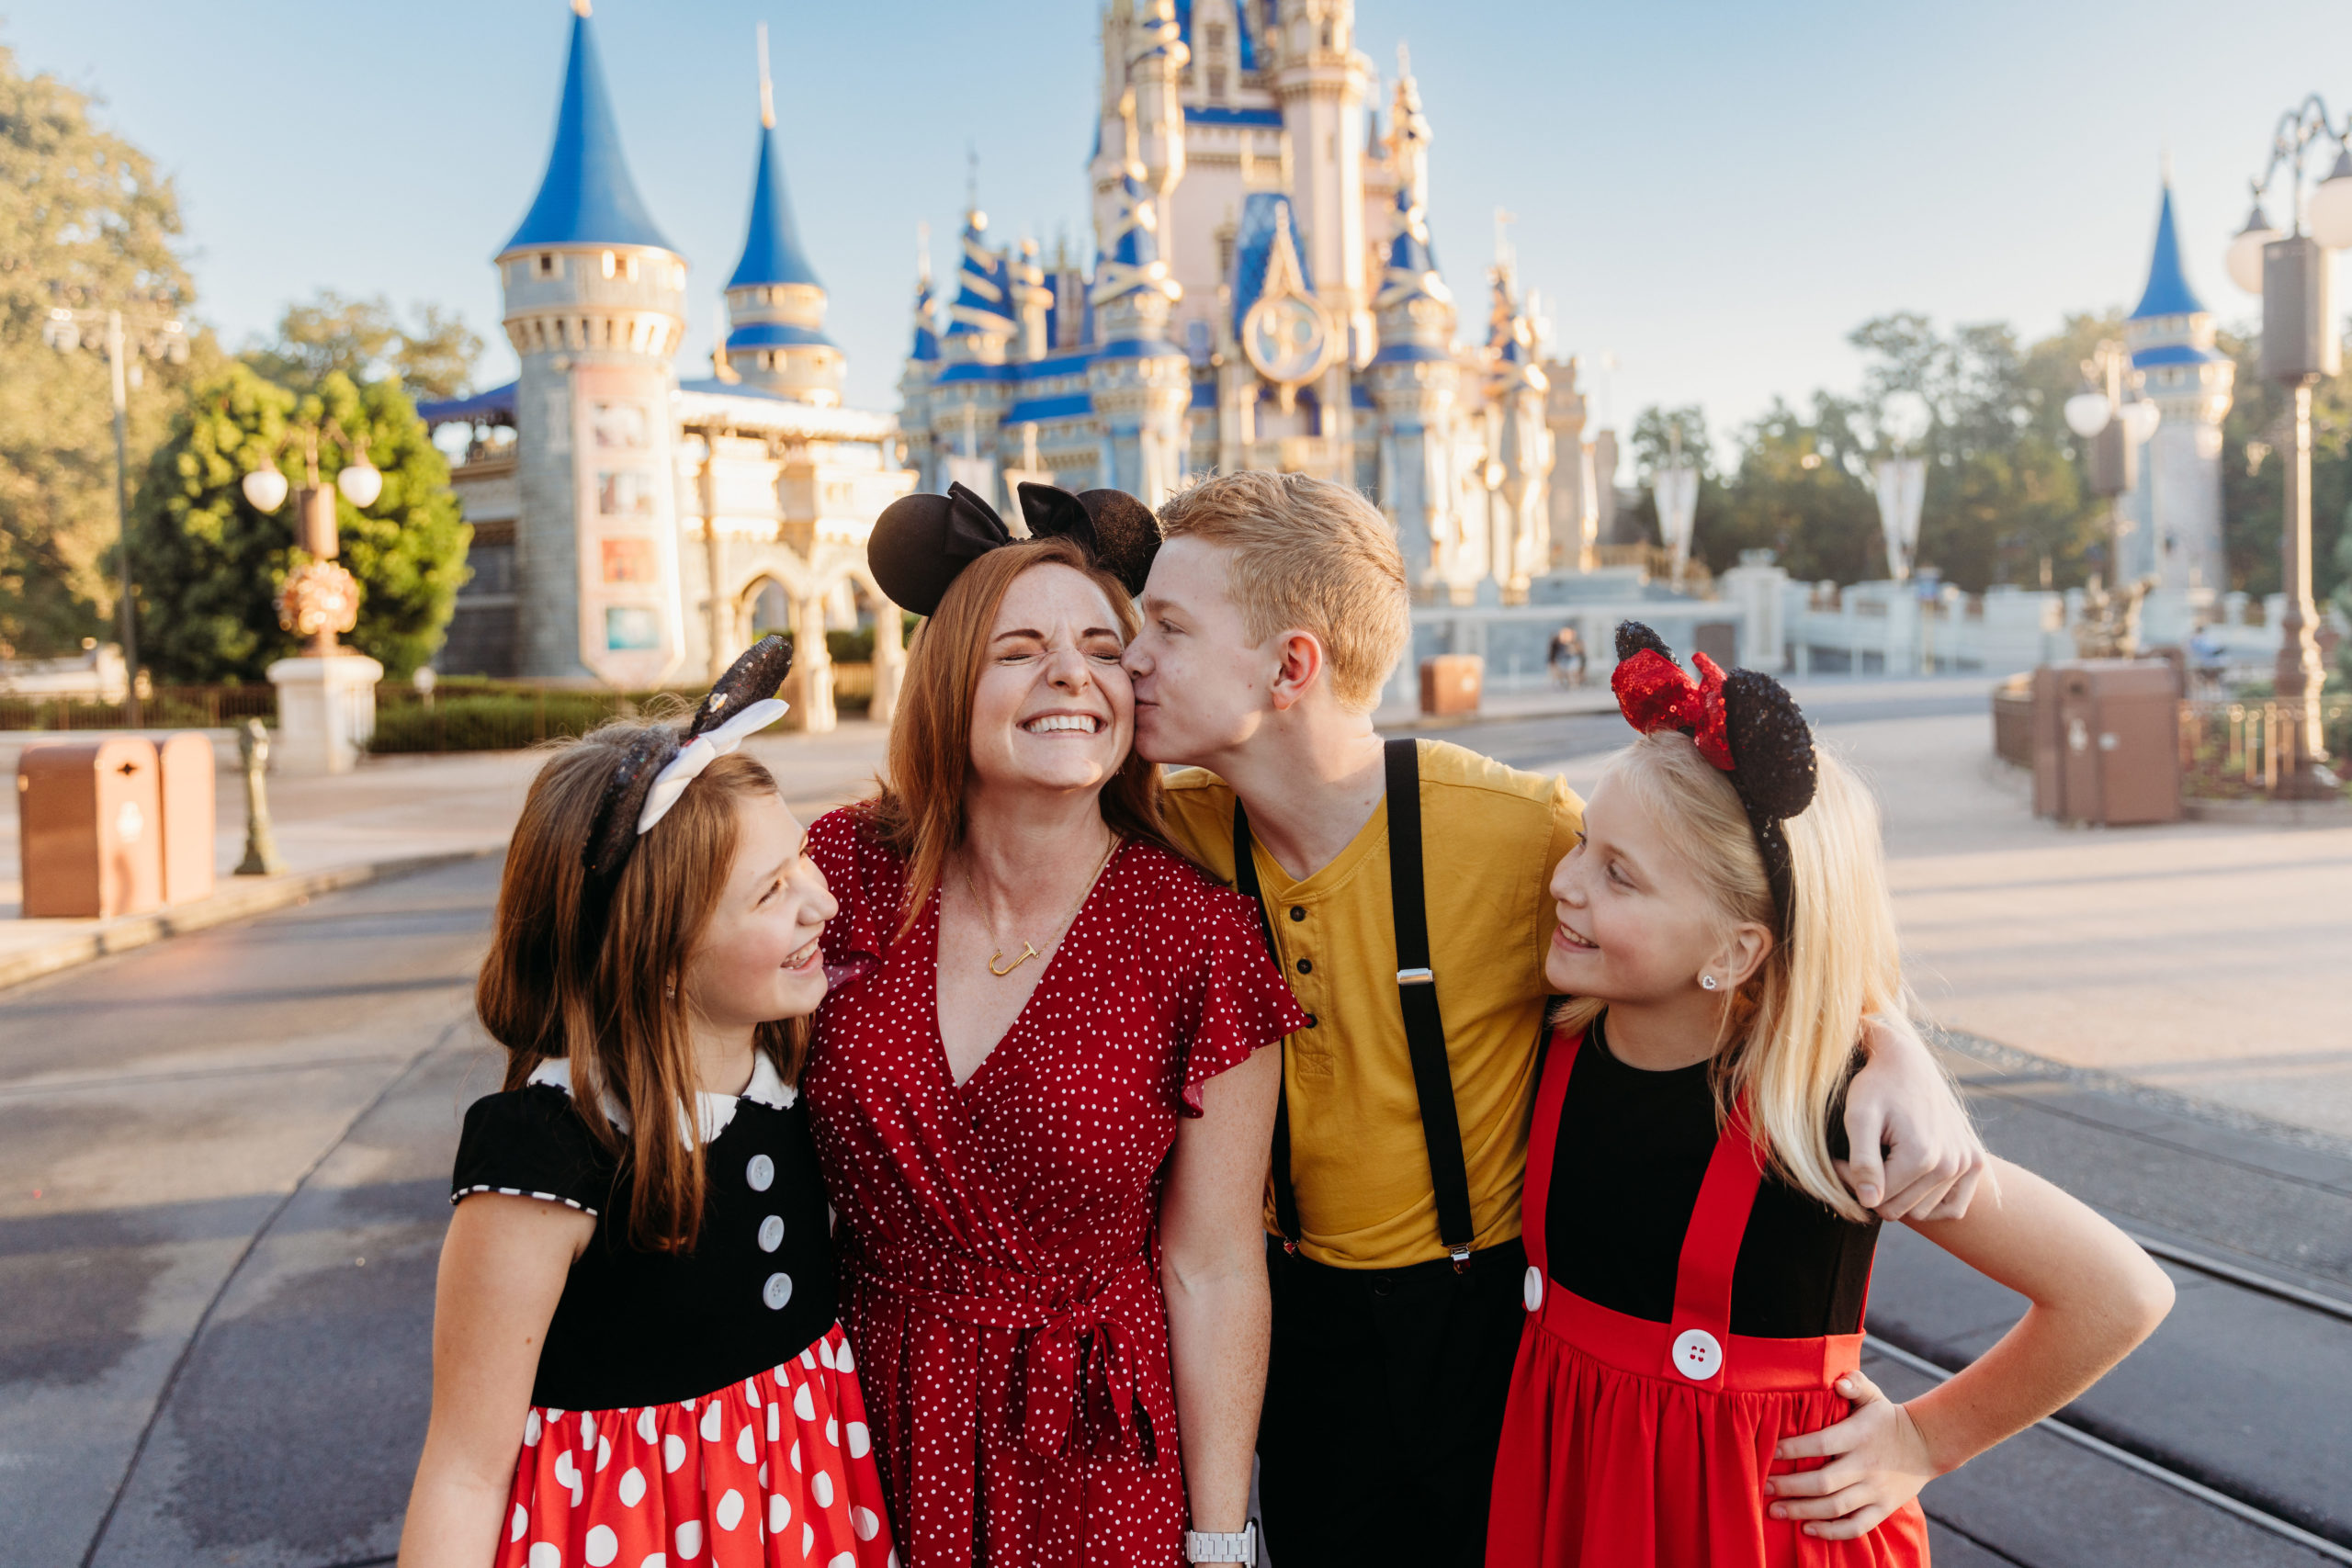
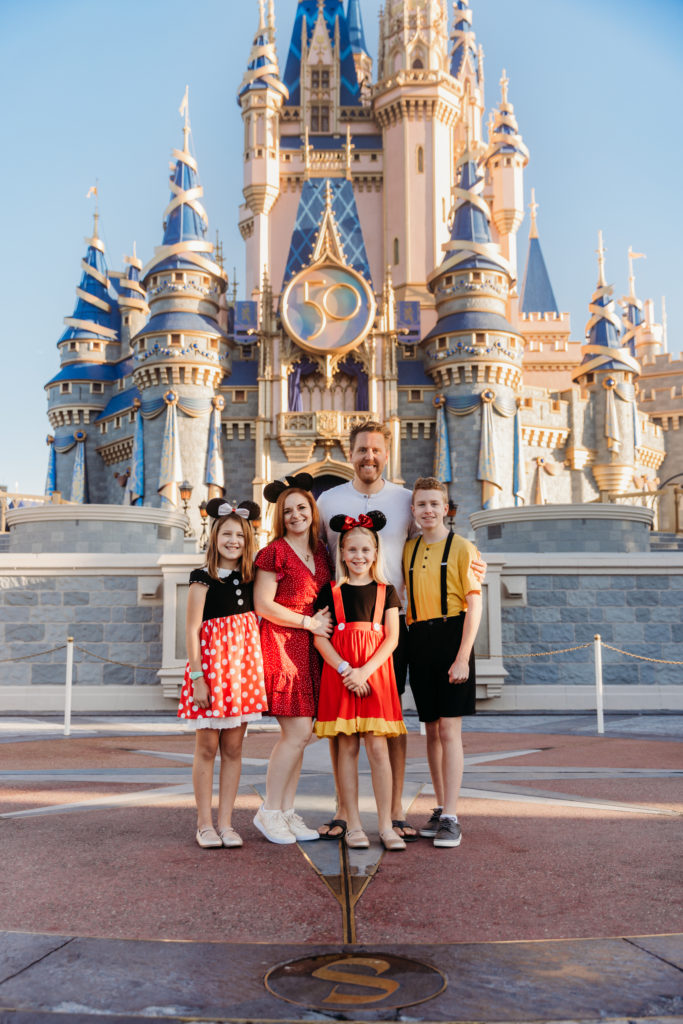
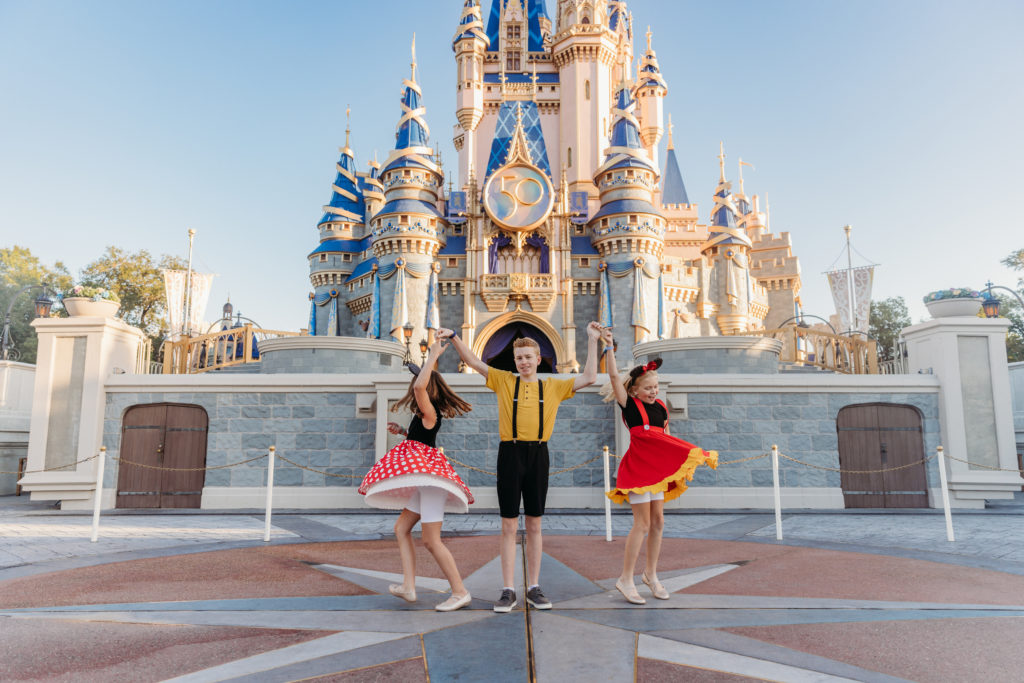
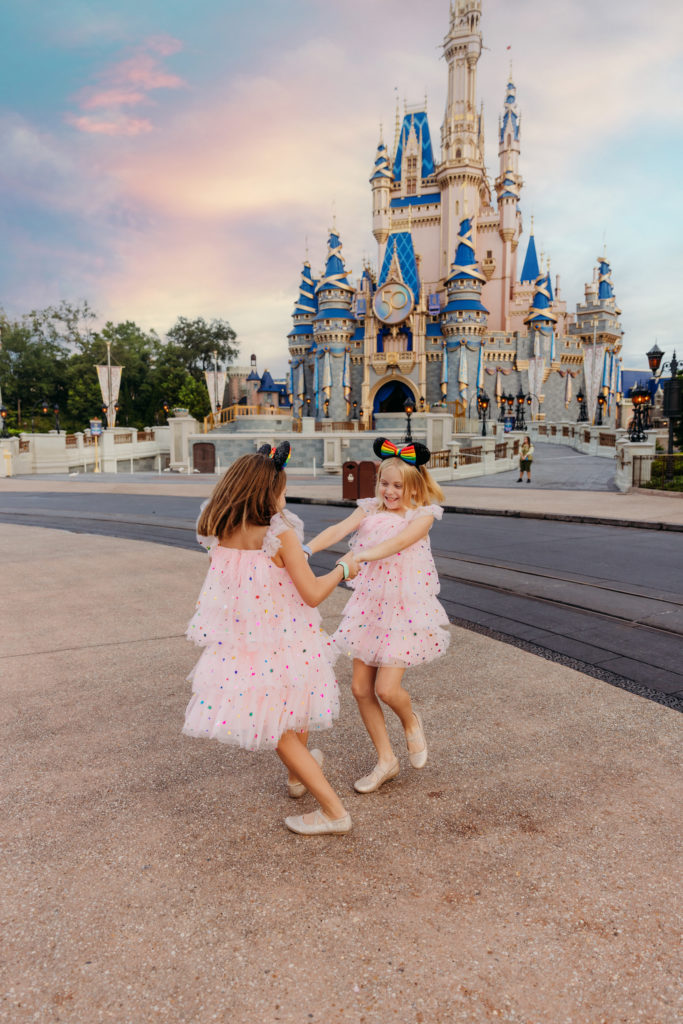
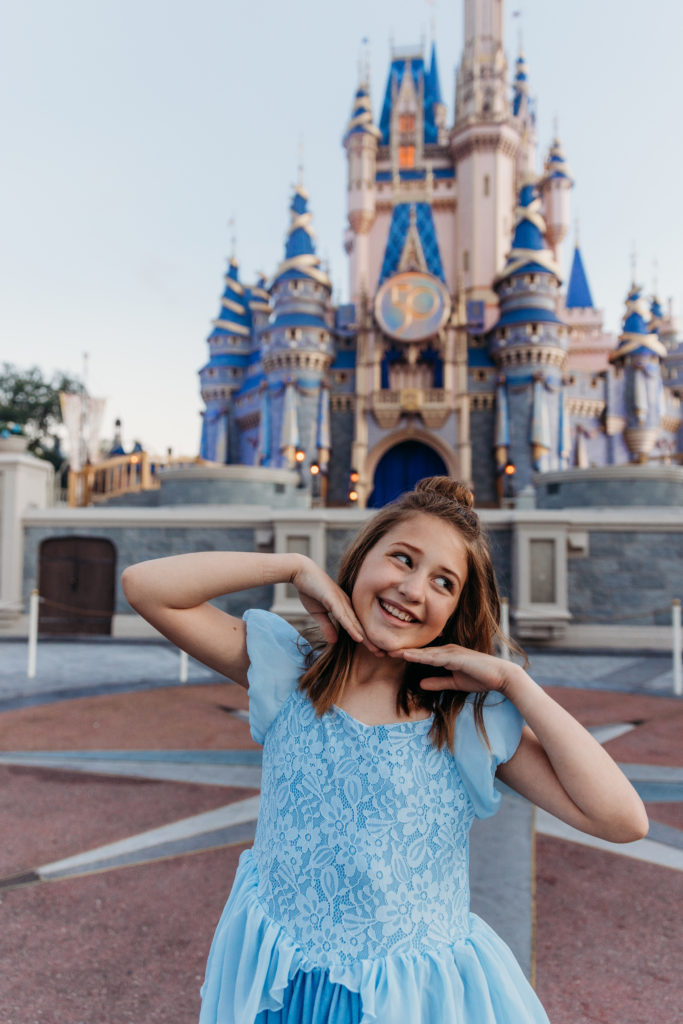
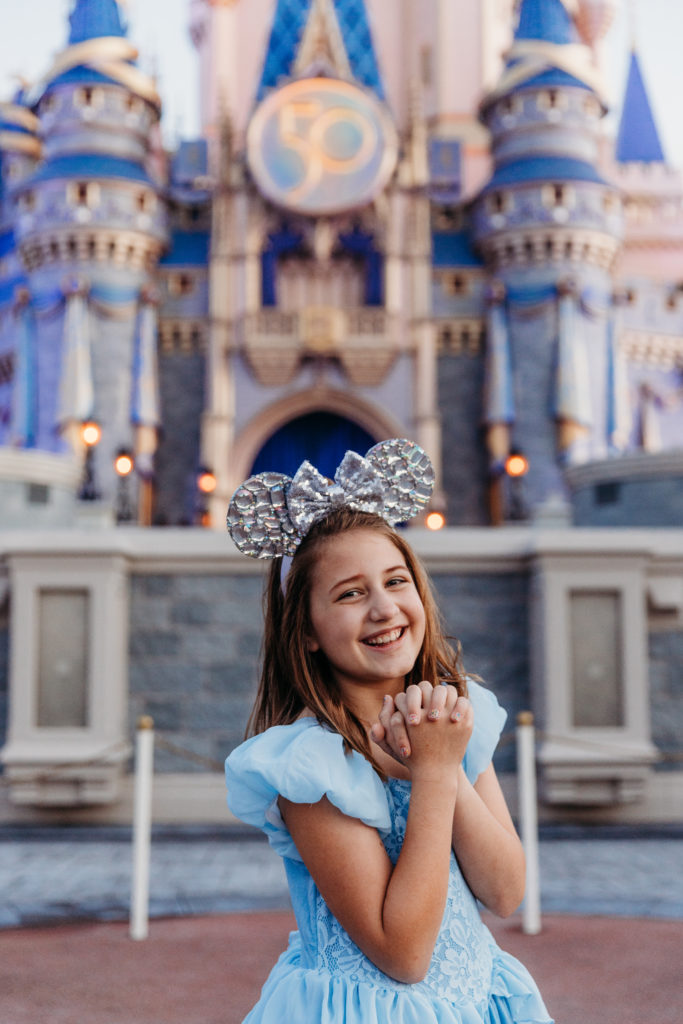
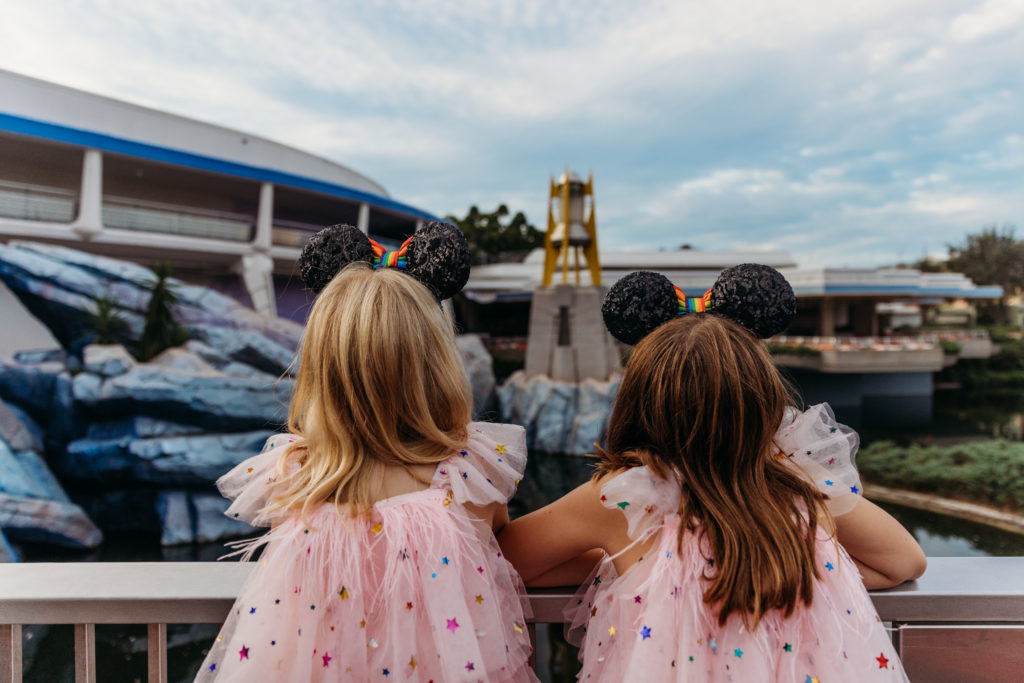
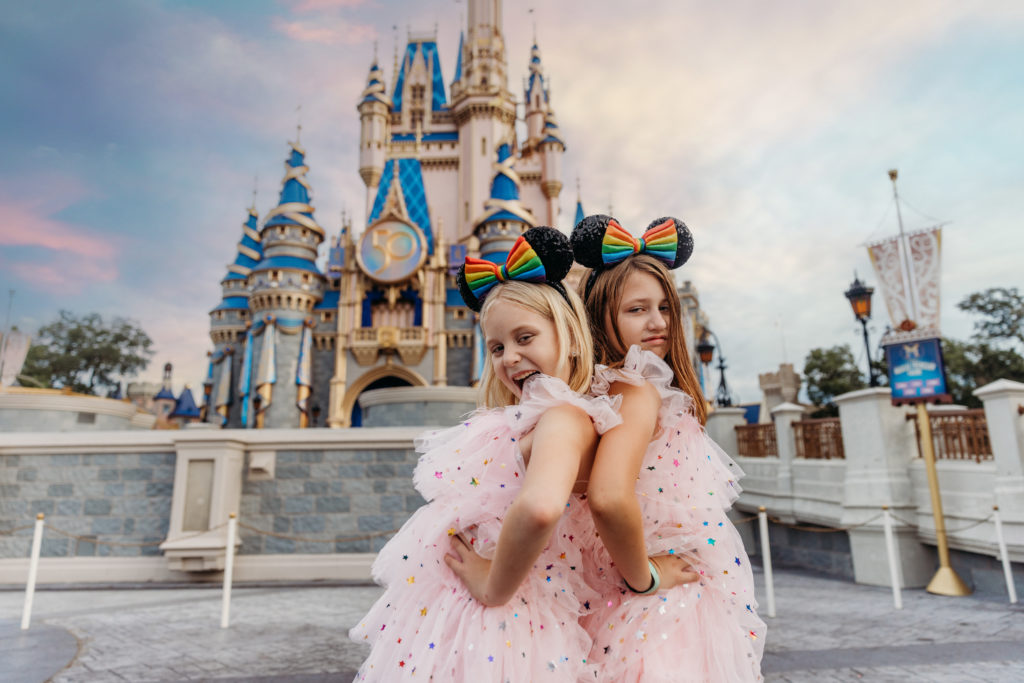
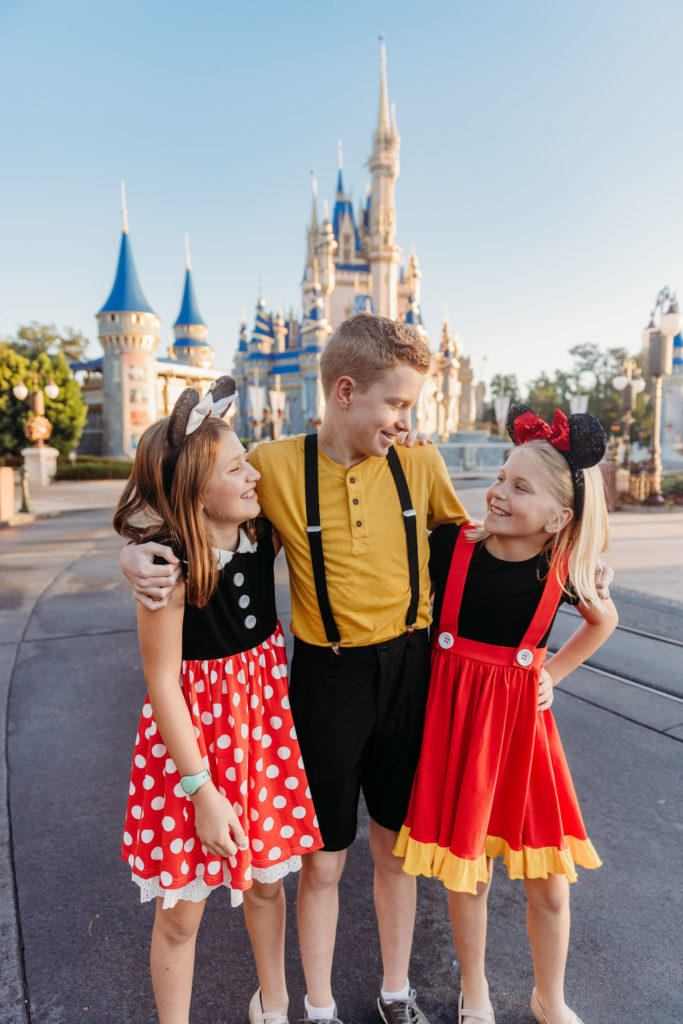
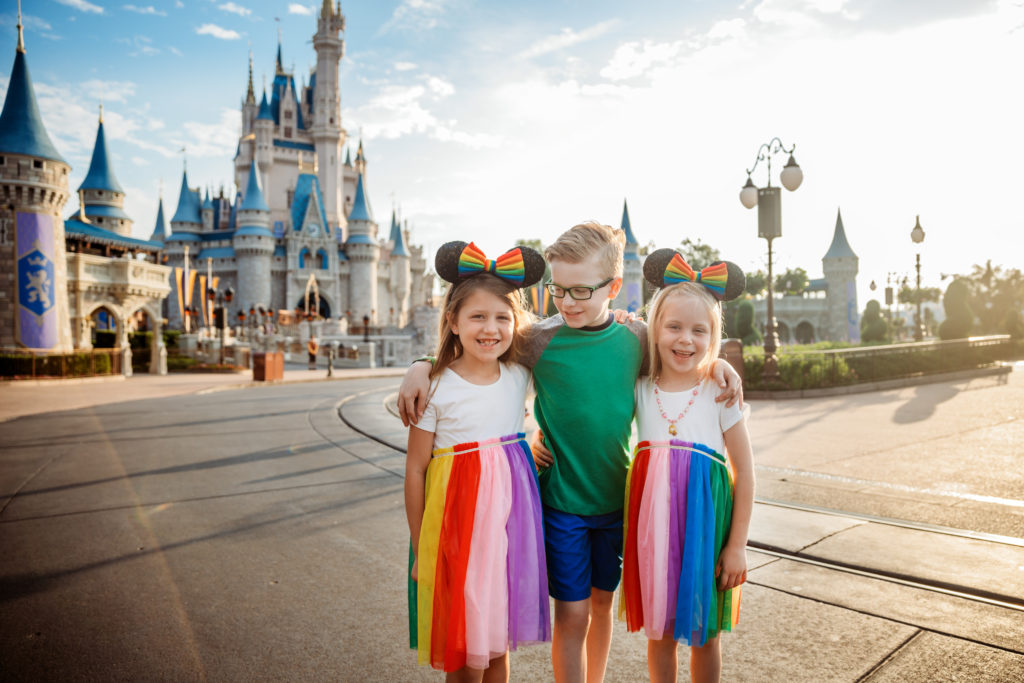
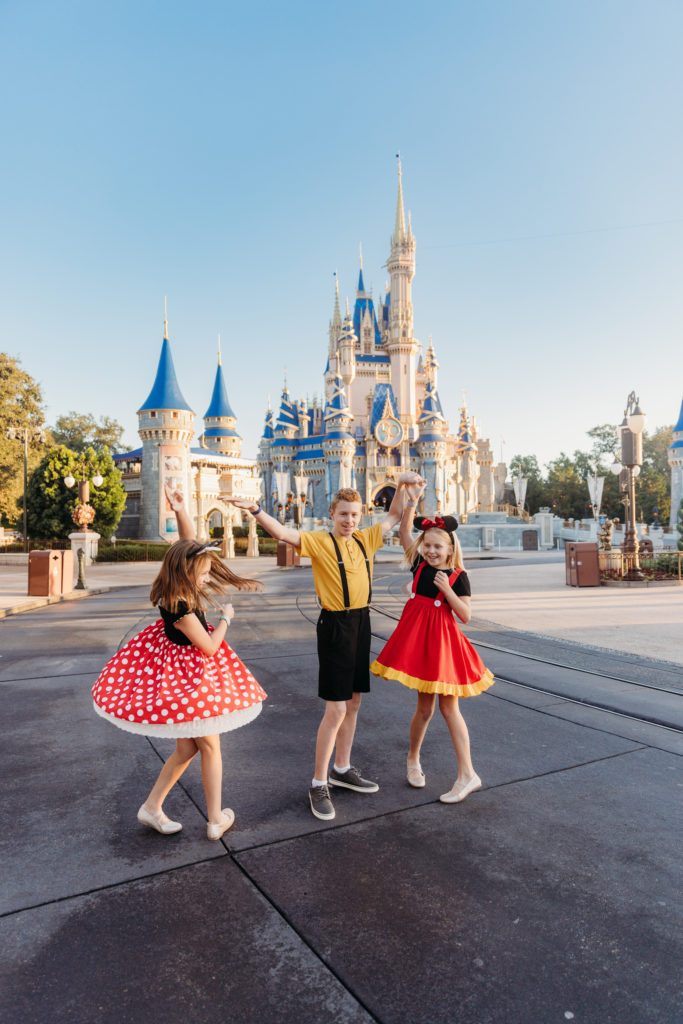
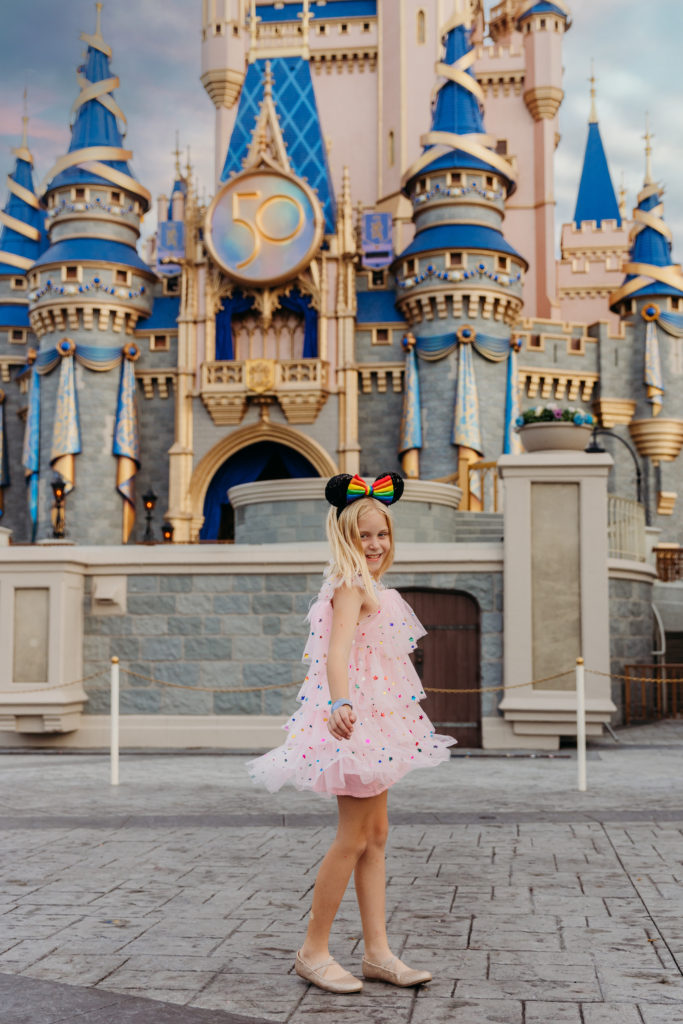
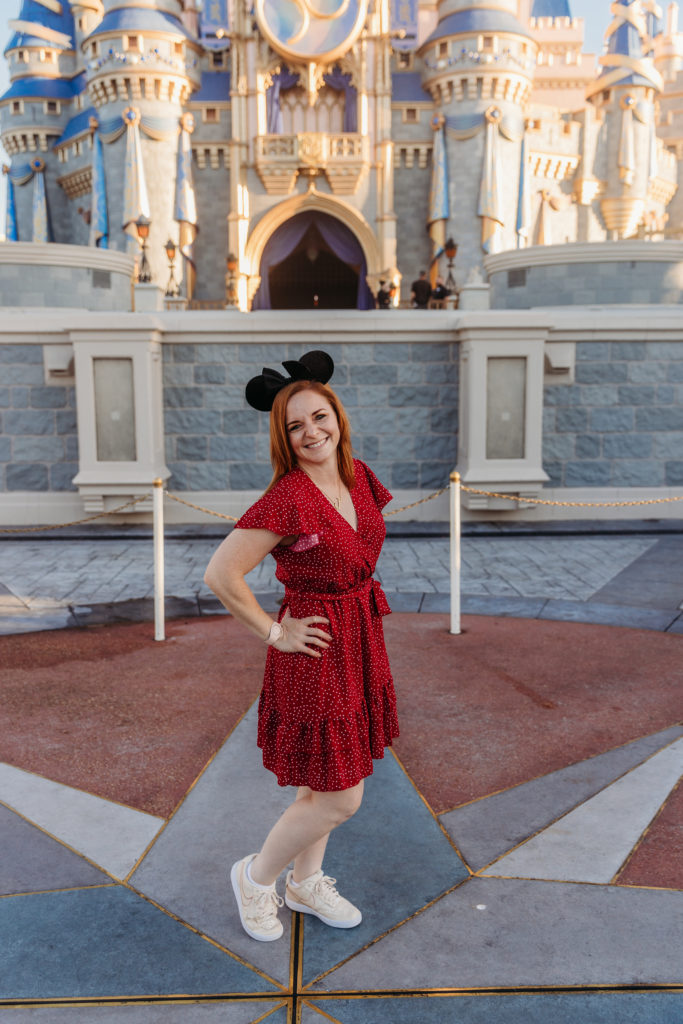
Alright we are finally here! The tips and advice that most of you are probably here for. How do I get so many shots in front of the castle WITHOUT PEOPLE IN THEM?! We were able to do this three times during our trip. Once for the shots with the Mickey/Minnie inspired outfits, once for my middle daughter’s birthday (because she requested it), and finally on our last day because we planned on rope dropping anyway with a mid afternoon flight. (The last day photos are the ones of the girls in the light pink dresses).
If these shots are must haves for you, you NEED to read these tips, print them off, and keep them with you, doing everything pretty much exactly as I say. This will ensure that you have what can easily be at least a solid 20 minutes in front of the castle without having to dodge or edit out a single person, or be rushed out because someone is waiting behind you for the same shot.
First things first. If you aren’t a Disney regular or pro in general (or if you are about to embark on your first trip), you’ll need to get acquainted with this main information on how/when the parks open.
Each park and each day can be different. As with any good Disney plan, you’ll likely have a solid itinerary with this information already well planned and written out.
Disney Resort Guests and Early Entry
If you are staying ON PROPERTY at a Disney Hotel/Resort, each day you are granted access into the parks 30 minutes before they open. While this is a perk that is available every day, the time DOES change as the park opening hours change from day to day. One day Magic Kingdom will have an official opening of 9am which makes Early Entry for hotel guests 8:30am that day. On another day, Magic Kingdom’s official opening can be as early as 8am making the Early Entry quite early at 7:30am.
My biggest tip to be able to get these empty castle photos is to stay on property. Having that extra 30 minutes doesn’t sound like much, but it REALLY makes a difference. Avid Disney rope droppers are not really going there to get the perfect photo opp. They are there for Mine Train and Space Mountain. This, of course, is a major perk to those of us photographers who are using this opportunity for the quietness in front of the castle while everyone else surges over to the ride lines. And you know what’s even more awesome? By the time I snagged the photos I wanted on the mornings we rope dropped for them, we STILL were able to get on Mine Train on one day within 20-25 minutes and Space Mountain within 10 minutes on another day. While we weren’t the first ones on the rides, I came away with tons of coveted photos AND we didn’t wait all that long for the rides any morning we did this.
I can’t say how doable these photos are by not staying on property. If you aren’t allowed in until actual park opening, there is already 30 minutes worth of people who have arrived. While most of the guests entering Magic Kingdom that early are there to jump to the line for Mine Train or Space Mountain as I said above, many will eventually make their way to wander around the castle, so while it’s probably safe to say it’s still fairly easy to use creative angles to avoid people, I can’t guarantee you’ll have much time before you get too frustrated with people walking through and behind your shot.
Ok. So now that you know how staying on property and Early Entry works, you can pick the day on your trip where it makes the most sense. Depending on how many days you are at Disney and how many of those you are devoting to Magic Kingdom, this could be easy or a little tricky.
If the answer is you only have one day at MK, then you only have one day to try. If your trip is longer, I would suggest saving this towards the middle of your trip for two reasons. One, you don’t really want this to be how you start your first day of your trip. Your family is probably going to want to jump to those rides immediately and making them hold off on the magic to snag photos MIGHT not go over well (although, side bar, the photos of us in red/black/yellow outfits DID end up being our first MK morning, but I digress….). Anyway, on the same token, you don’t want to save this for your last day at the park in the event of bad weather. If it rains, you’d sadly be out of luck.
Finally, don’t forget to check sunrise time. The light was completely gorgeous on our first rope dropping day (the day we took the Mickey/Minnie inspired outfits that follow the detailed timeline below). On my daughter’s actual birthday, one of her main requests was to start the day with MORE photos in front of the castle in a special dress she had picked out. That day Magic Kingdom opened even earlier (an 8am regular park opening, which meant a 7:30am Early Entry and a Main Street opening around 6:45am). It was still fairly “dark” for the first 15 minutes we were in front of the castle. We couldn’t avoid this because she wanted the photos taken on her actual birthday. Make sure to note sunrise time and chose your Magic Kingdom day when opening will be during the best light. During certain times of the year, it may not make sense to choose a day when Magic Kingdom opens at 8am for regular hours.
Transportation to the Park
Now that you’ve chosen your day, make sure to take note of park opening and the Early Entry time if you are a Disney resort guest and your next task is to get there as early as you can! This means you are at the mercy of the Disney bus system OR you could use the Minnie Van service as one of my well-versed Disney veteran friends shared with me (I haven’t done that myself, so I don’t have any further advice there). This is another advantage of staying on property. If you don’t stay on property, whatever your mode of transportation is will drop you off in a further back parking lot. From there, you will either need to take the monorail or the ferry to get to the main entrance of Magic Kingdom, all taking up more time and another vote from me to just stay on Disney property.
Going forward, I’m going to solely focus on being a Disney Resort guest and utilizing Early Entry and the Disney transportation system as the buses drop you off as close as you can be to the first security gate. However, if you are staying at the Contemporary, you can just hop on the monorail and ignore alllll my tips about the buses though, just FYI. (It is a pipe dream of mine to one day stay at that resort!).
The VERY FIRST buses pick up at the resorts 90 minutes BEFORE EARLY ENTRY. If you want the best results out of this rope dropping photo adventure, plan to be on the first bus! This also comes with a few caveats to consider, however.
I know what you were thinking: “8:30 am, not so bad, right?!”. Except you can’t show up to Magic Kingdom right at 8:30am. You’ll be in a long line of people that got there much sooner waiting to be let in with their Magic Bands at the park entrance. Ideally you want to be on the first bus.
Most resorts have multiple bus stops. There WILL be other people at most of your resorts’ various bus stops. This is a hard one for me to advise on, as some mornings we saw crazy amounts of people ready to get on the first busses to each park, and other mornings we were the first ones (AND ONLY ONES in our entire resort) on our first bus. As in, each subsequent stop there was no one there and after a quick door open the bus could just keep moving along.
The day we were the only people picked up at our resort (which was Port Orleans Riverside this last trip) was my middle daughter’s birthday. Because we didn’t stop for anyone else, we arrived at Magic Kingdom literally as fast as was possible and were the literal first people in the security line. Yes, we Clark Griswold’ed our rope dropping in the “First ones here!” fashion many times this trip. (Side bar, it’s also how we normally roll with visiting the parks anyway. Get there early before it’s too crowded and leave when it gets too peoply and hot!)
I can’t speak to how busy some resorts stops are compared to others, but if you want to be sure to be on the first bus, and to not have the sad event of watching a full bus roll on by and not be able to stop, not only plan your time to get to the first bus of the day, but if your resort has multiple stops, google the one that is first on the route and walk to that one if it’s not the one closest to you. (Hey, what’s a few more extra steps to start the day!?)
In addition, each resort isn’t equidistant from Magic Kingdom, so google/map out what it is from your specific resort just so you are aware of exactly when you will arrive at the main gate. For us, it was a 15-minute ride.
Are you still with me? I told you, this was involved and carefully planned out to make it happen.
Before I dive into exactly what our timing and morning looked like to get these photos, you also must know that the Main Street USA area is opened PRIOR TO EARLY ENTRY. We just keep backtracking our time earlier and earlier, don’t we?!
Yes, so all this talk about the park opening early at 8:30am, that 8:30am time is when the cast members lift the rope at Fantasyland and Tomorrowland and people can start queuing in the line, with ideally, the first people riding the first ride right about at Early Entry opening. The general rule of thumb is that Main Street will open about an hour prior to Early Entry time. And you want to make sure you are there early enough to be as close to the front of that line as possible before they start letting people in.
Many of the shops, including Starbucks on Main Street are open to peruse, but most importantly, the circular hub in front of the castle and immediately in front of the castle is open as soon as Main Street opens too!
Finally, I have one last tiny, detailed tip to help you even further in getting as far in the front of the entrance line as possible. The first checkpoint you will encounter after getting dropped off by the bus is the security line. If you have arrived early enough, this won’t be open yet. Most mornings we were there early enough to be held by security, but on our first morning, we had just missed it, so we walked on through. However, if you want to walk on through and NOT be stopped for a bag search (obviously causing more people to be able to get in front of you), know what you might be carrying that will trigger the metal detectors and thus a subsequent bag search and have those items out and held clearly in front of you with your arms out as you walk through the metal detector. For us it was my camera and my daughter’s glasses’ case that tripped us up the first security line, so we learned quickly what to hold out to not get held up in a bag search.
And before I move forward, are there maybe some other less stressful ways to do this? Like utilizing the Minnie Van service and skipping the bus all together? Very likely, but because I do not have experience in that, I can’t speak to that. And like I said, pay a bit more money and stay at the Contemporary and you’re as close as you can possibly be with a quick monorail ride (again, I’d probably recommend getting on the first train!). That’s not feasible for everyone so if you are staying at a value or moderate Disney resort (or any other further away deluxe resorts), this is how you do it. This “first bus to Magic Kingdom” method of mine works as I have done it successfully 5 times over 2 different vacations and I know it will work for you, too.
So. Let’s give an example of exact times. For the morning we took these Mickey/Minnie inspired outfit photos, the following is how it occurred, working completely backwards.

The Timeline of it All
9am: Magic Kingdom Regular Opening to all guests
8:30am: Early Entry for Resort Guests
7:40am: Main Street is opened to Early Entry guests and you hustle to the castle.
7:20am: Arrived at Magic Kingdom via Disney bus. The security line had already opened, and we were NOT in the first groups of people there that day, but still plenty early enough.
7:05am: Our bus arrives to our resort stop (a little late). Should be 90 minutes prior to Early Entry. 3 more stops for us and a 15-minute ride to MK.
6:50am: We arrived at our bus stop (which just happened to be the first stop at Port Orleans anyway).
5:50am: I awake my children in shifts, starting with the child who is the easiest to wake up and ending with the one that needs the most sleep. I’ll let you guess who is who. As they wake up and lights are flipped on, all bags are finished being packed for the day with all the essentials.
4:45am: I wake up, shower, and get myself ready, lay out all the outfits/ears/etc. so that the very sleepy children just need to get dressed and brush teeth and hair.
Side bar: In the midst of this crazy early timeline, we also had to remember all the park “to-do’s” for the day including buying our genie plus and being ready to pick our first Lightning Lane.
Remember when I said early entry was 8:30am and that’s not so bad? Yeah. To execute this with the promise of the most success, you are absolutely looking at a 5am or so wake up call for yourself. Earlier if you require more time, maybe slightly later if you and your family can roll out of bed and wake up quick. I knew I was going to be in these photos too, so I did allow a little more time for myself, and just in general when preparing for things like this, I ALWAYS build in a little extra time because one of my children fights waking up with every fiber of her being if she’s not ready to wake up. So extra time to account for that and, well, anything unexpected is always a good thing.
I did absolutely everything I could the night before. Mine and the girls’ dresses and boys’ shirts were pressed since they got all wrinkly in the suitcases. My camera and all accessories were packed, and on this day, extra clothes and shoes were packed. If you are thinking I’m a little extra, you already know this to be true because you’ve made it this far in the guide. However, I had exactly enough outfits packed for each day, and while I wanted this set of outfits for these photos in front of the castle, we had other Magic Kingdom inspired outfits for the day AND these Mickey/Minnie outfits served dual purpose as our last day outfits. Thus, we had to change. Which meant we had to bring a change of clothes. And shoes. Because the girls never would have lasted walking around the park in ballet type flat shoes.
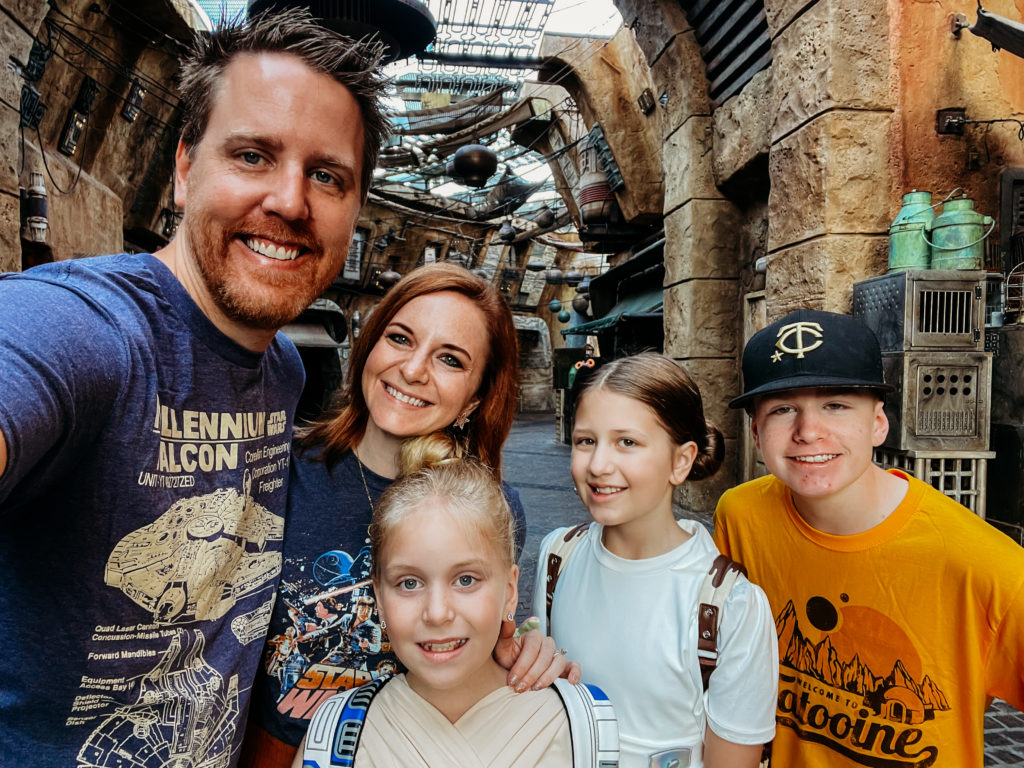
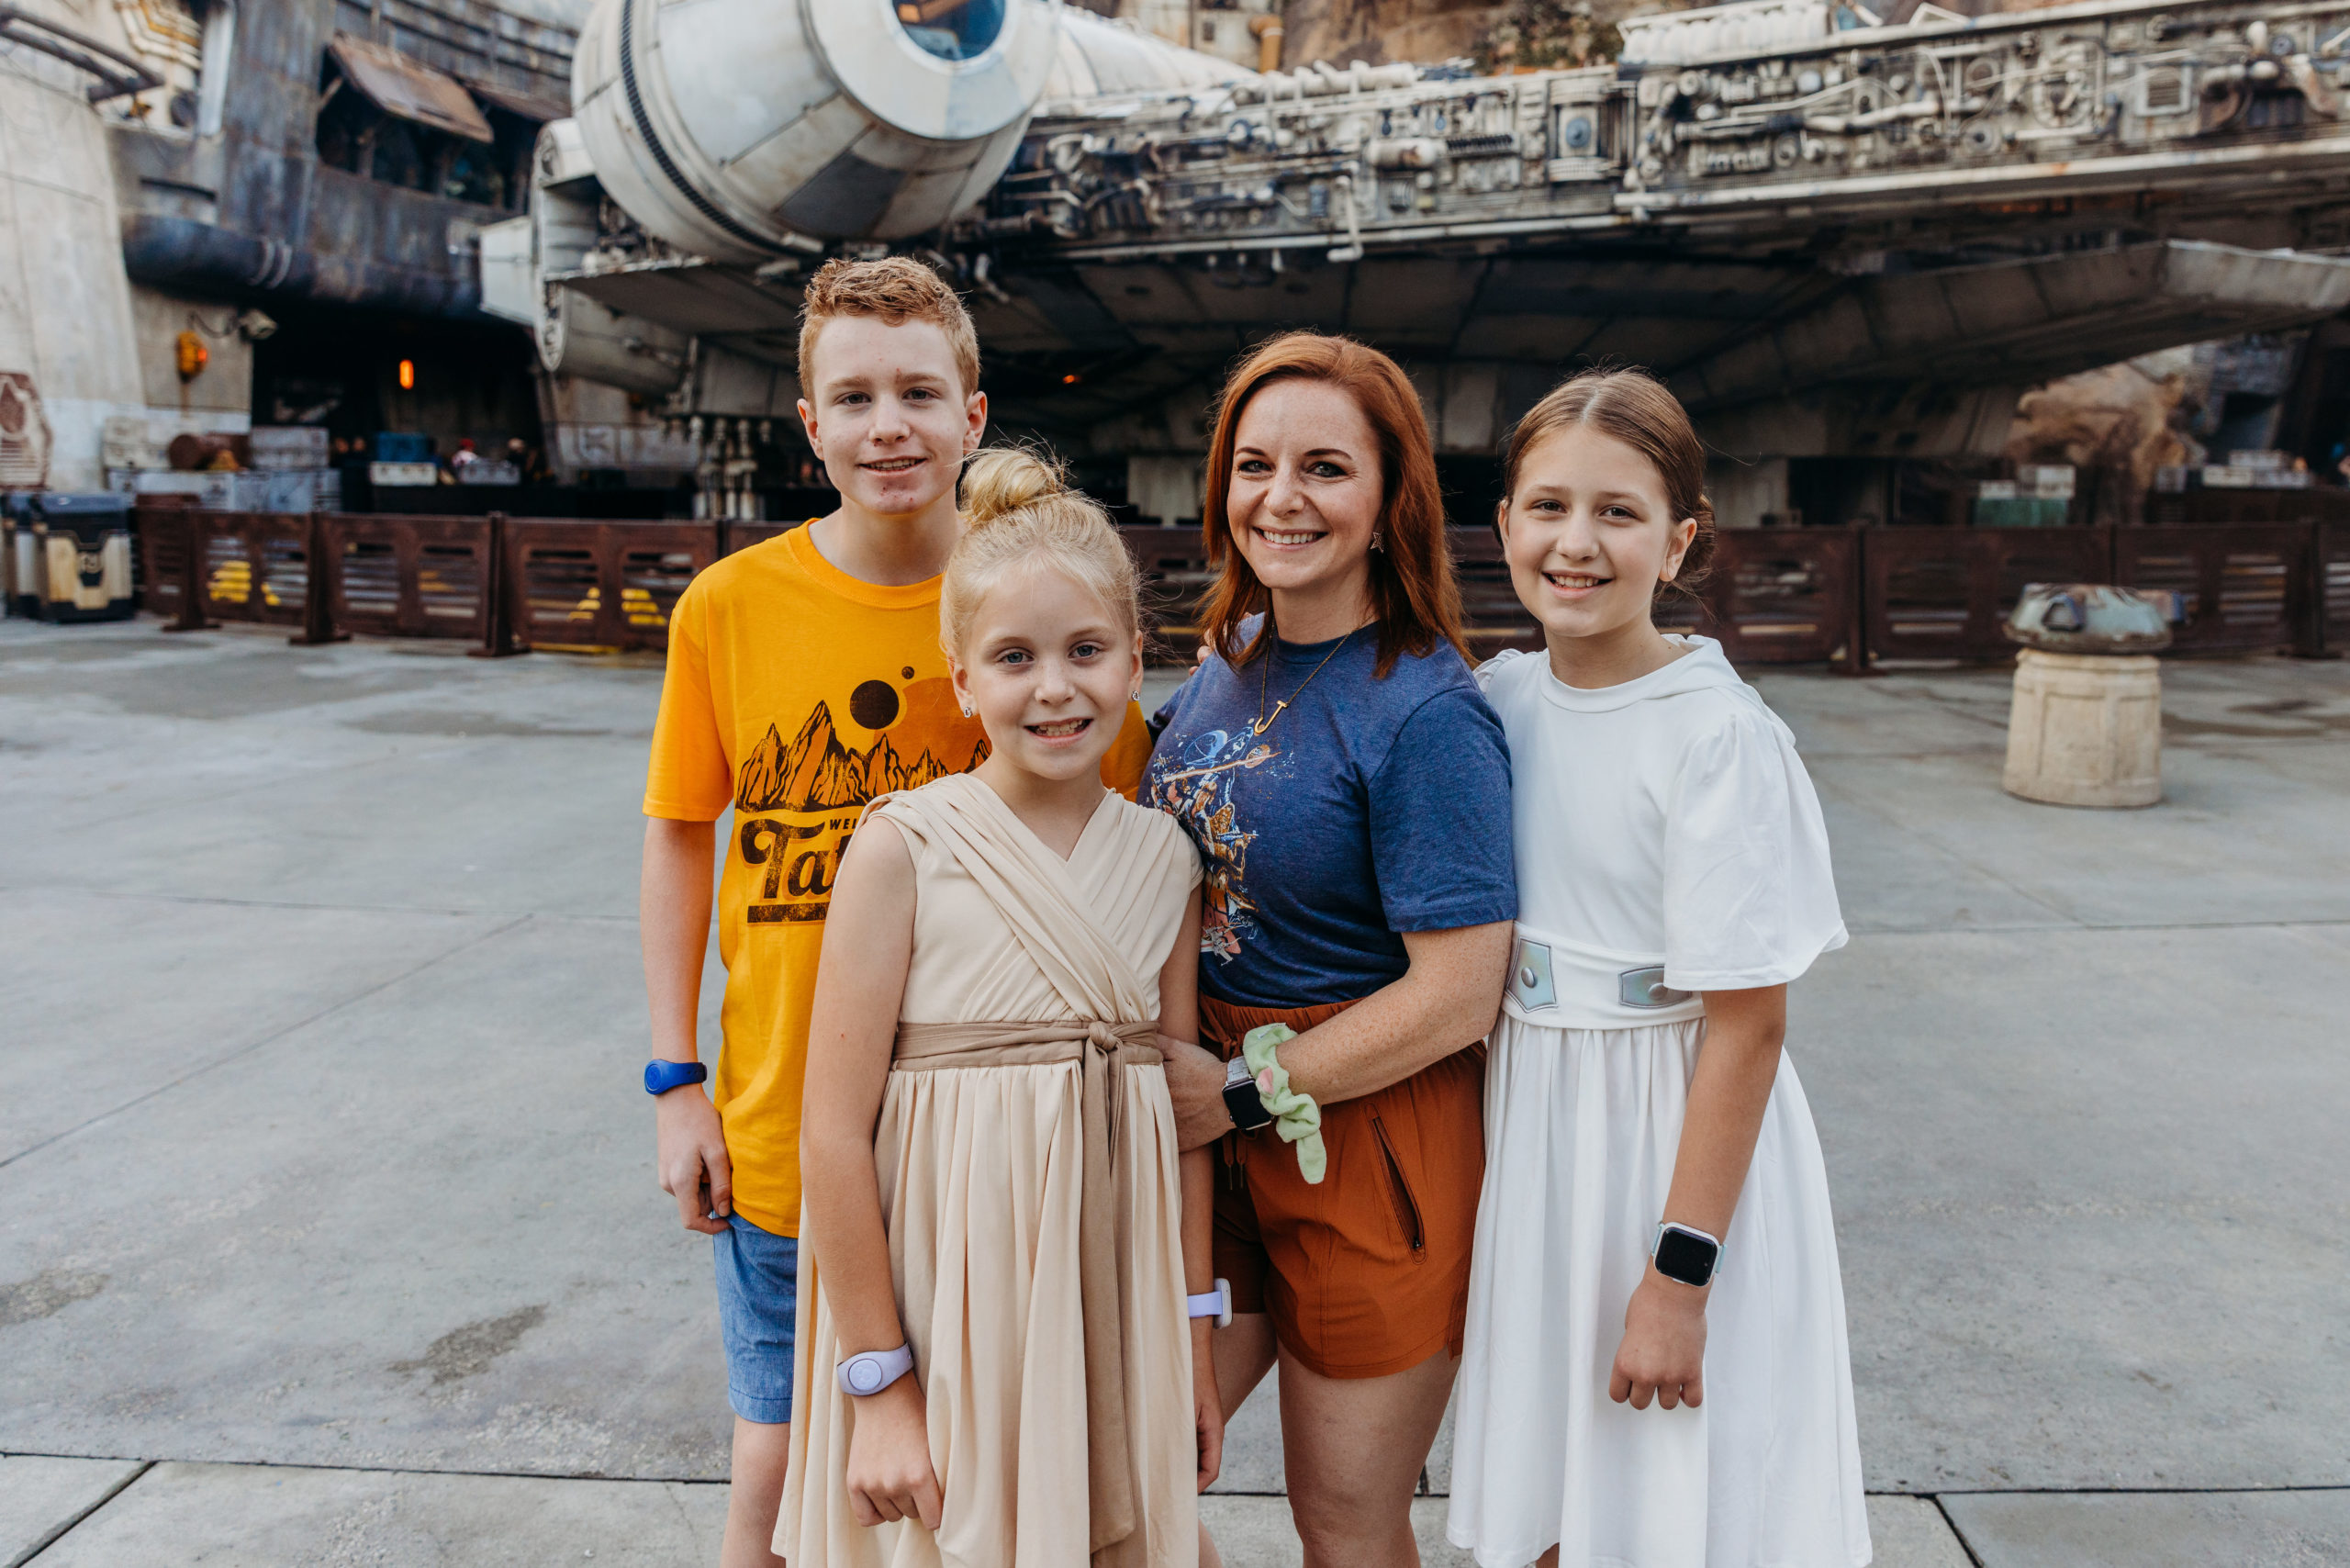
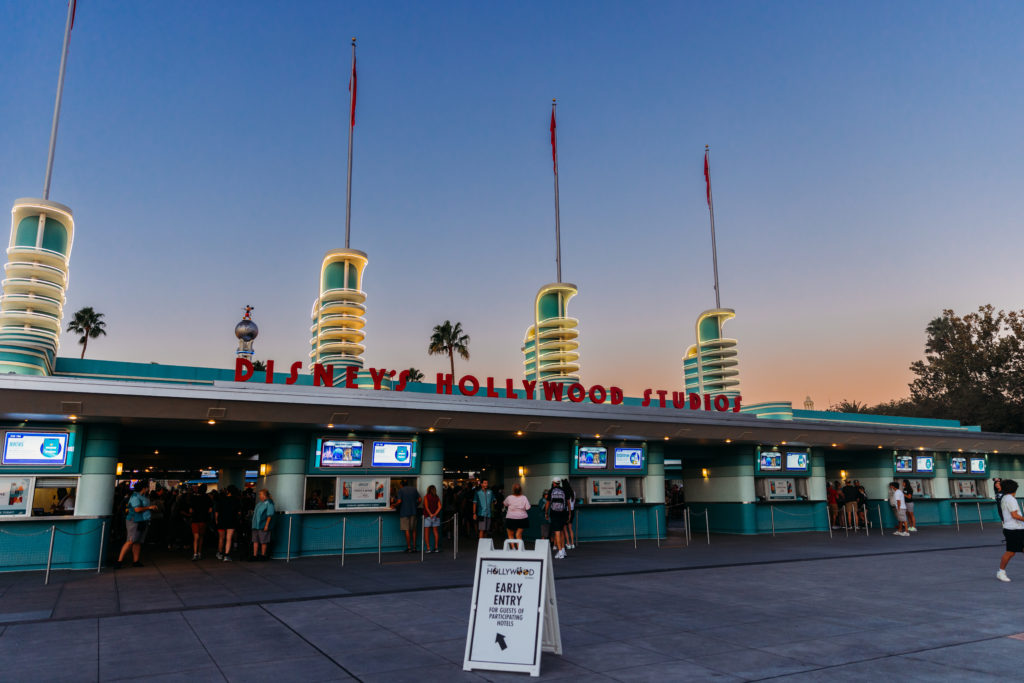
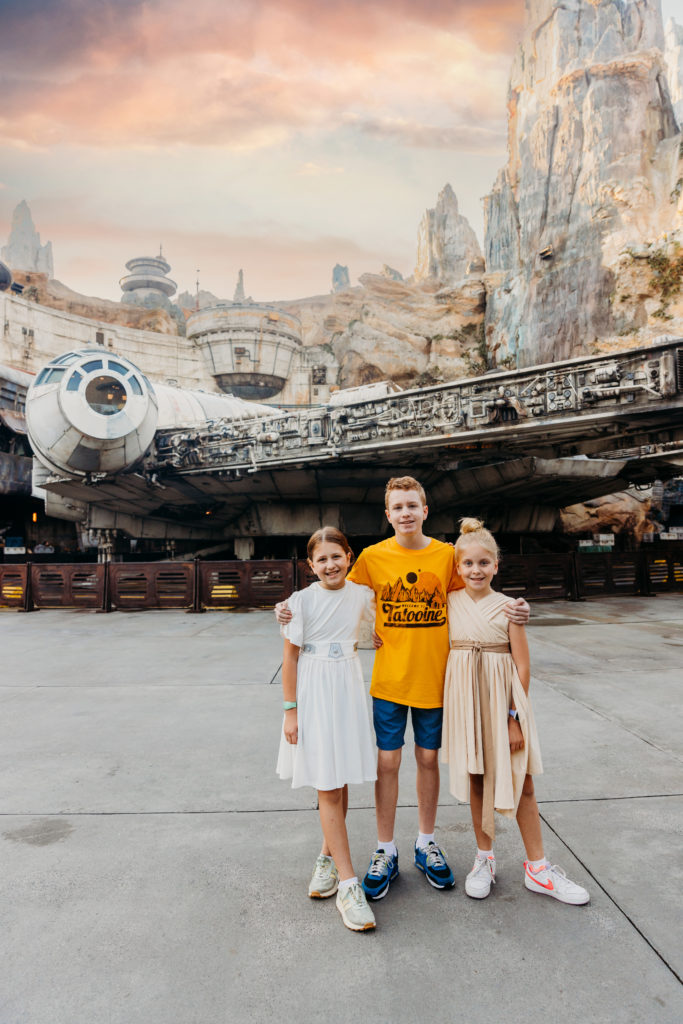
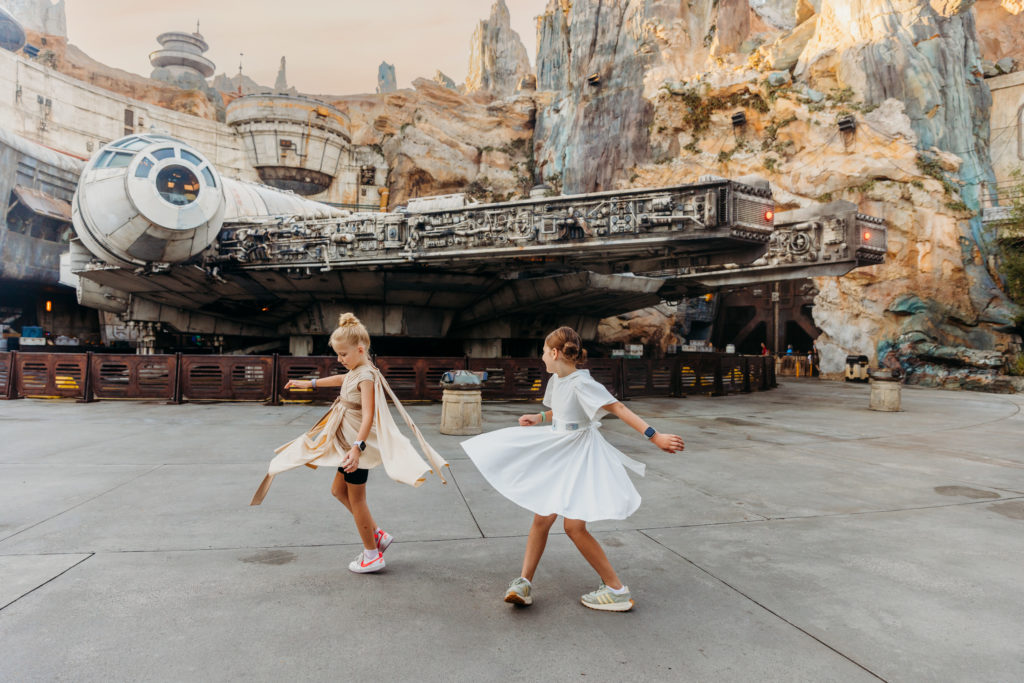
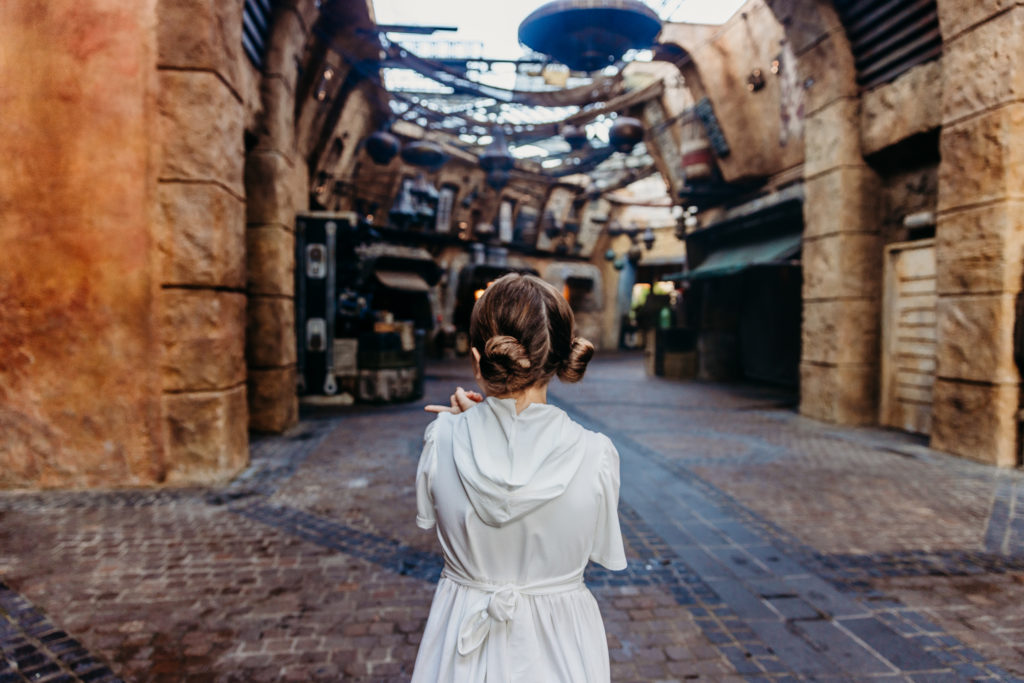
Repeat this entire general process if you would like empty Star Wars photos at Hollywood Studios in front of the Millennium Falcon. Same for an empty Spaceship Earth and Tree of Life shot but you can definitely relax a bit as those front areas of the park don’t seem to fill as quickly as the castle and Star Wars areas do. Those shots have never been all the important to me, and in fact, I forget to even snag a Tree of Life shot this trip.
If somehow you are reading this and don’t care about rope dropping for photos, this exact method also doubles as a great way to be near first in line to which ever ride you are wanting to go on at any park. Want to rope drop Avatar, Mine Train, Remy, or Rise of the Resistance with as little wait as possible? Do.it.this.way. This is how you rope drop, regardless of if it’s for photos or rides. We were literally the first family on Avatar Flight of Passage the day we went to Animal Kingdom.
Summarizing the timeline
When it was all said and done, my family and I were in front of the castle taking photos beginning around 7:45am (that’s a full hour and 15 minutes before the park opens to the regular public). We had a solid 20 minutes or more where people really weren’t around, and honestly, I could have shot longer, but I felt like I got what I needed while still allowing ourselves enough time to hop in the mass crowd line waiting to be let into Fantasyland for Mine Train. Once it opened and we got ourselves in line for that ride, we had about a 20-25 minute wait. Not bad considering we opted for the photos first and THEN got in line.
If you only have one day at Magic Kingdom, I’m here to tell you, you can do both! Because Main Street opens earlier, you can rope drop for the photos AND rope drop the ride (what the rope drop refers to)! Also, important to note, many people line up for the castle photo pass photographers, and many of the people who were taking their own photos opted for the spot immediately in front of the Walt and Mickey statue. Not as many people were around the hub circle or directly in front of the castle, even as we moved on and stopped shooting.
I woke up at 4:45am.
General Shooting Advice
Start further back from the castle in the hub/circle to get some further away shots. Then, as more people start to enter the area, get closer to the castle. I had zero issues with people being in our way, or even people wanting to shoot right where we were shooting. I.e., I didn’t create a line at this magical little spot I first chose. It was ours and it was ours for a solid 10 minutes before we decided to move. It wasn’t until the very end of our shooting time that I’d say there was a handful of people that were directly in front of the castle besides us. Does this mean you COULD hop on the second bus from your resort? Maybe? But it wasn’t a chance I was willing to take.
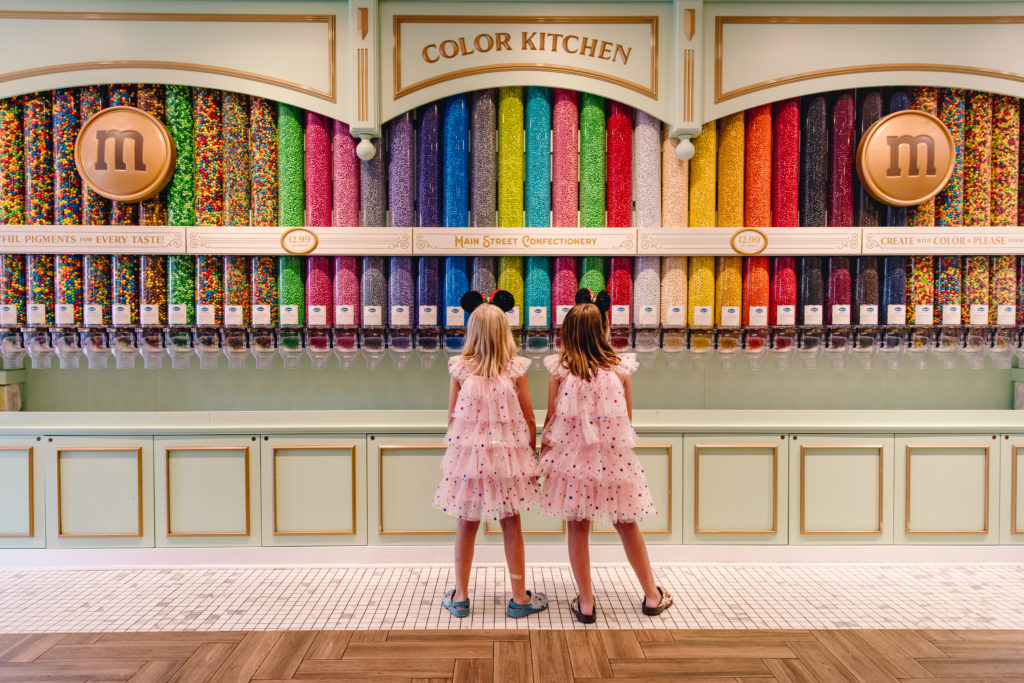
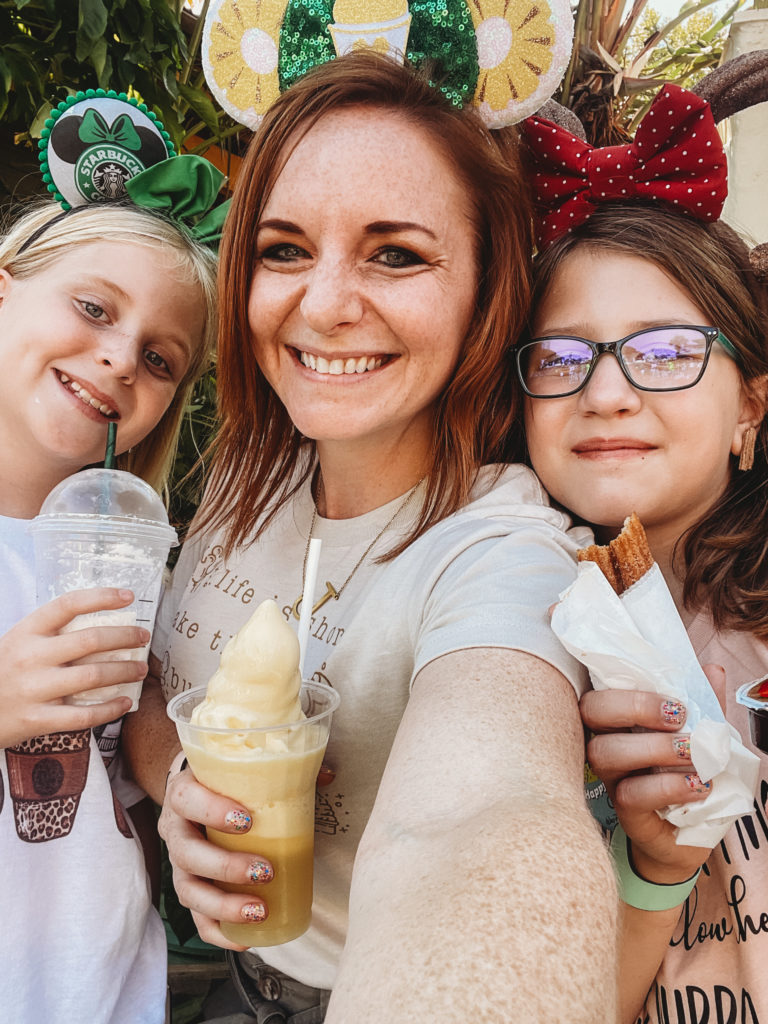
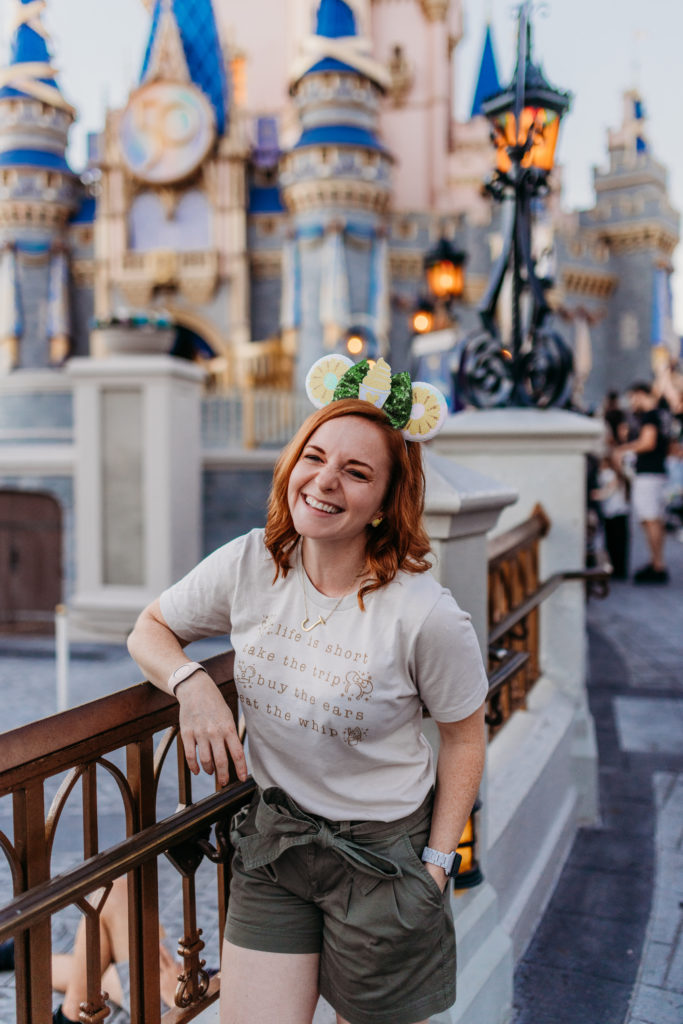
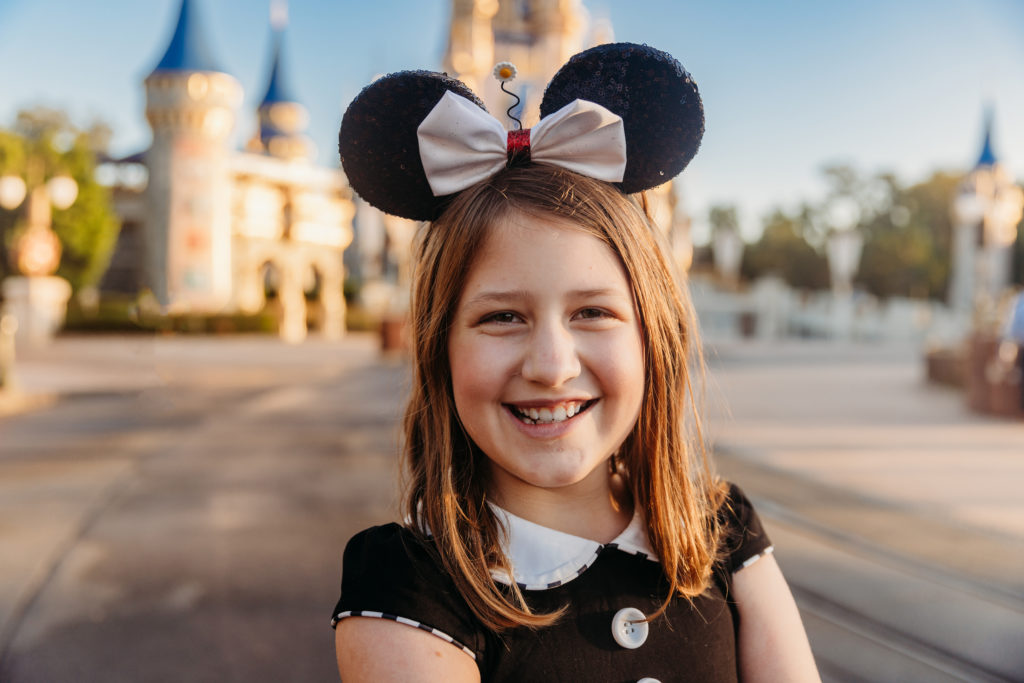
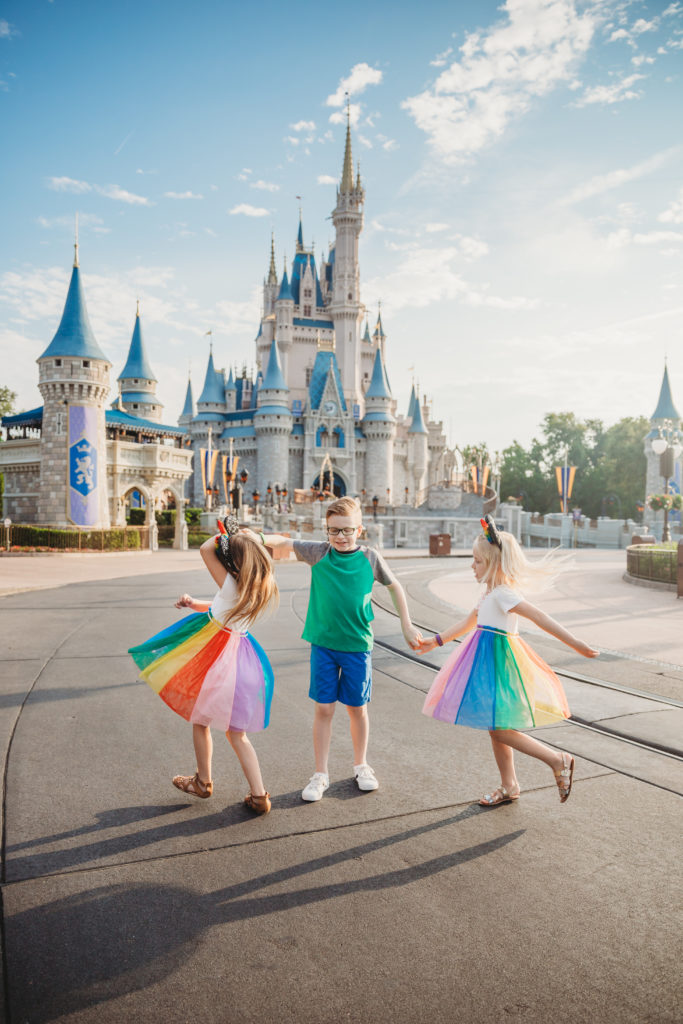
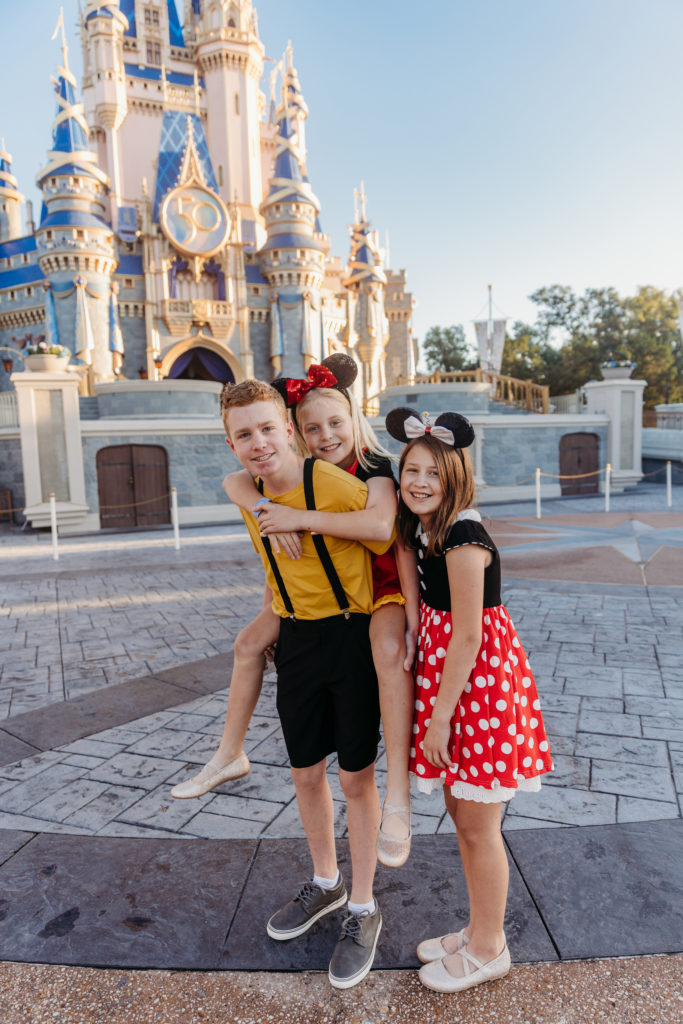
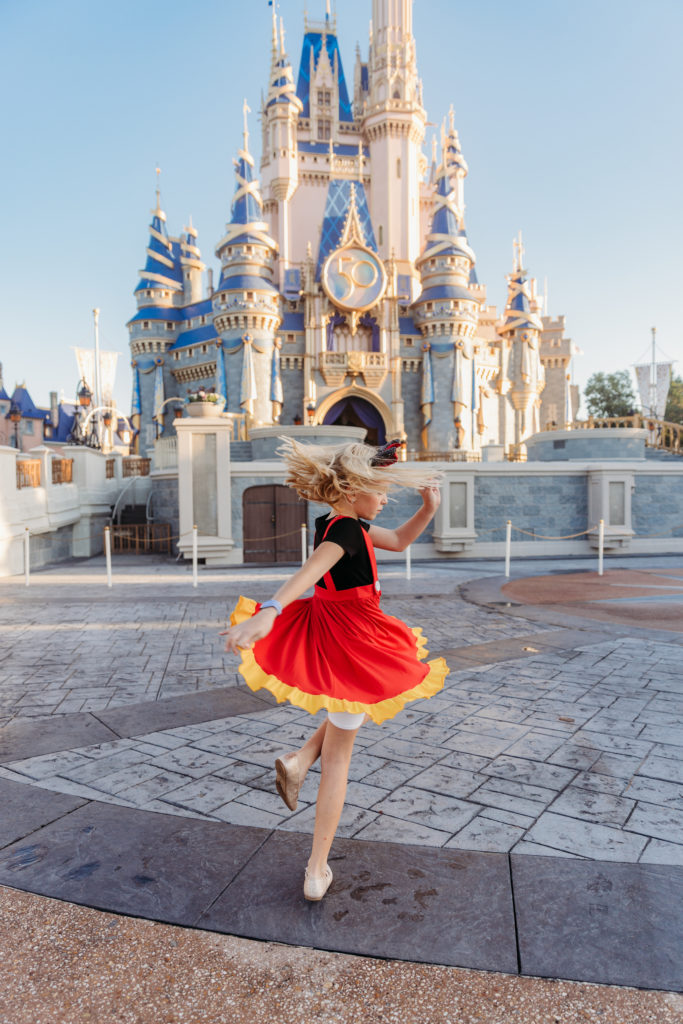
If you have girls, find them dresses. I fear I’m getting closer and closer to the age where they will absolutely refuse dresses for a short while, but thankfully my girls love a good theme, and I found a few twirly dresses they loved all from Only Little Once. Both the Mickey/Minnie set and the Star Wars set were from that shop. There is just so much more variety to be had in a dress (and this tip honestly goes for regular family photos too where I always suggest daughters and moms are in dresses). I love movement and twirls and how that in and of itself usually generates lots of candid joy in my girls’ and clients alike, so dresses are a must for me.

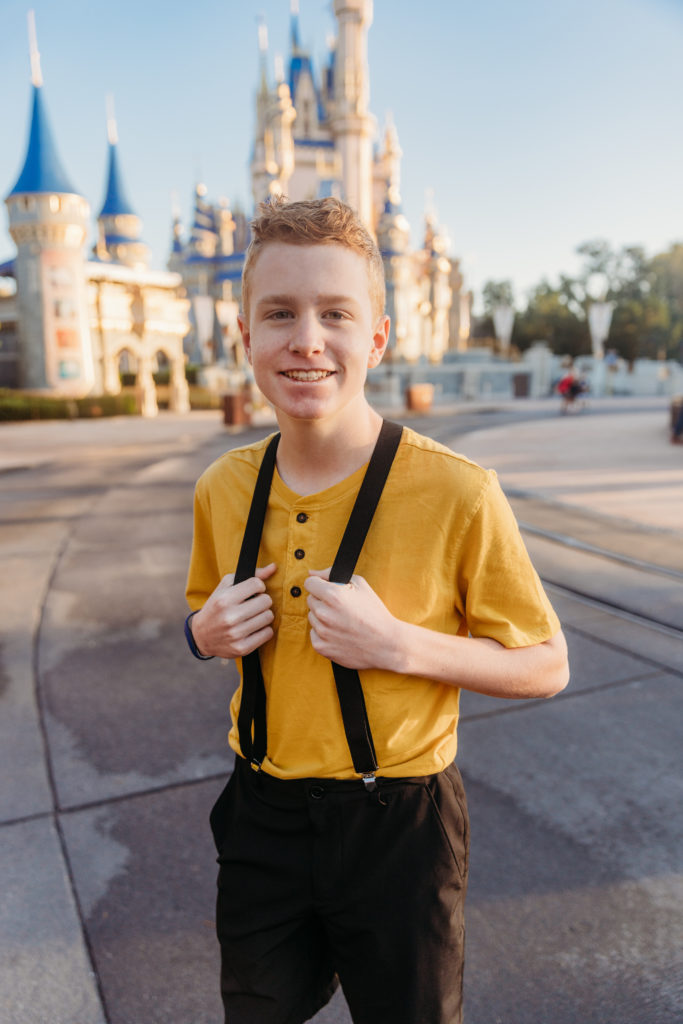
I also remember getting questions about how I got my son in suspenders. I don’t know what to tell you other than he’s lived his entire life with a mom who has a camera in his hand. He’s old enough to of course, not CHOOSE the suspenders on his own, but it means he’s also old enough to know that “Hey, if I do this for mom really quick, even though I don’t want to, it makes her happy and then I can take them off”. He knows the faster he cooperates and the more accommodating he is, the faster it’s all over.
For me, I shot this “set” of photos as I normally do when I take my kids out all together for “official” photos (4th of July, Christmas, beach sessions, etc.). We get the safe, everyone looking at me shots in a few different poses, I get each of them individually looking at me. I elicit some good, big giggles from them both individually and all together. My oldest gives the youngest a piggyback ride, my girls snuggle (if I beg and promise a treat these days), the dresses twirl and wa-la. A little mini-session of your kids is complete at the most magical place on earth.
Conclusion
That was a lot of info. The day we did this, I jotted down a few notes in my phone about timing so that I wouldn’t forget. I can’t believe how detailed this became after I finally sat down to type it out. It’s so much information. I’m sure it’s overwhelming, so if you have any questions at all, feel free to reach out. I know it sounds overly complicated and I likely may have discouraged some of you from even attempting it. At the end of the day, it’s really nothing more than waking up a little extra early (as a reminder, it was 4:45am for me!) and ensuring you are on the first bus to Magic Kingdom. Prep your kids (and husband) for what this entails and have a plan of action. That’s it. It WILL work and you will get the most amazing photos to treasure your Disney Vacation forever.
I’m a self proclaimed lover of all things Disney World after a 2001 marching band trip where I literally fell in love with my now husband. After picking up a camera when I was pregnant with my first child in late 2008, I’ve been a photographer for going on 14 years, taking 7 separate trips to Disney World/Land during that time. I sincerely hope, that despite how overwhelming this may have been, that it inspired you and helped you prepare for your next trip! If you’ve enjoyed these tips and want to stay connected as your trip approaches, have more questions, or just want to hang with like minded Disney photography loving people such as me, join my brand new Facebook group where we can do all that and share our favorite photos and how we got them. It was so hard to pick and choose what to share here, so if you’d like to see more from me, I’m more than willing to share!
https://www.facebook.com/groups/6069394406415696 (If this link doesn’t work for you, search for “The Happiest Photos on Earth: Tips and Tricks for magical documentation of your Disney Vacation!”
For more photos of my regular work, check out this recent post! https://snapberryphotographs.com/2022/03/18/prosper-tx-family-photographer-snapberry-photographs-2/
CATEGORY
1/08/2023


Hi! I’m new here, found you on Facebook! I was wondering what editing software you use because the editing, while it seems minor, is BEAUTIFUL!
I use Lightroom mostly and sometimes Photoshop when needed!